Step 1—Create the inbound shipment
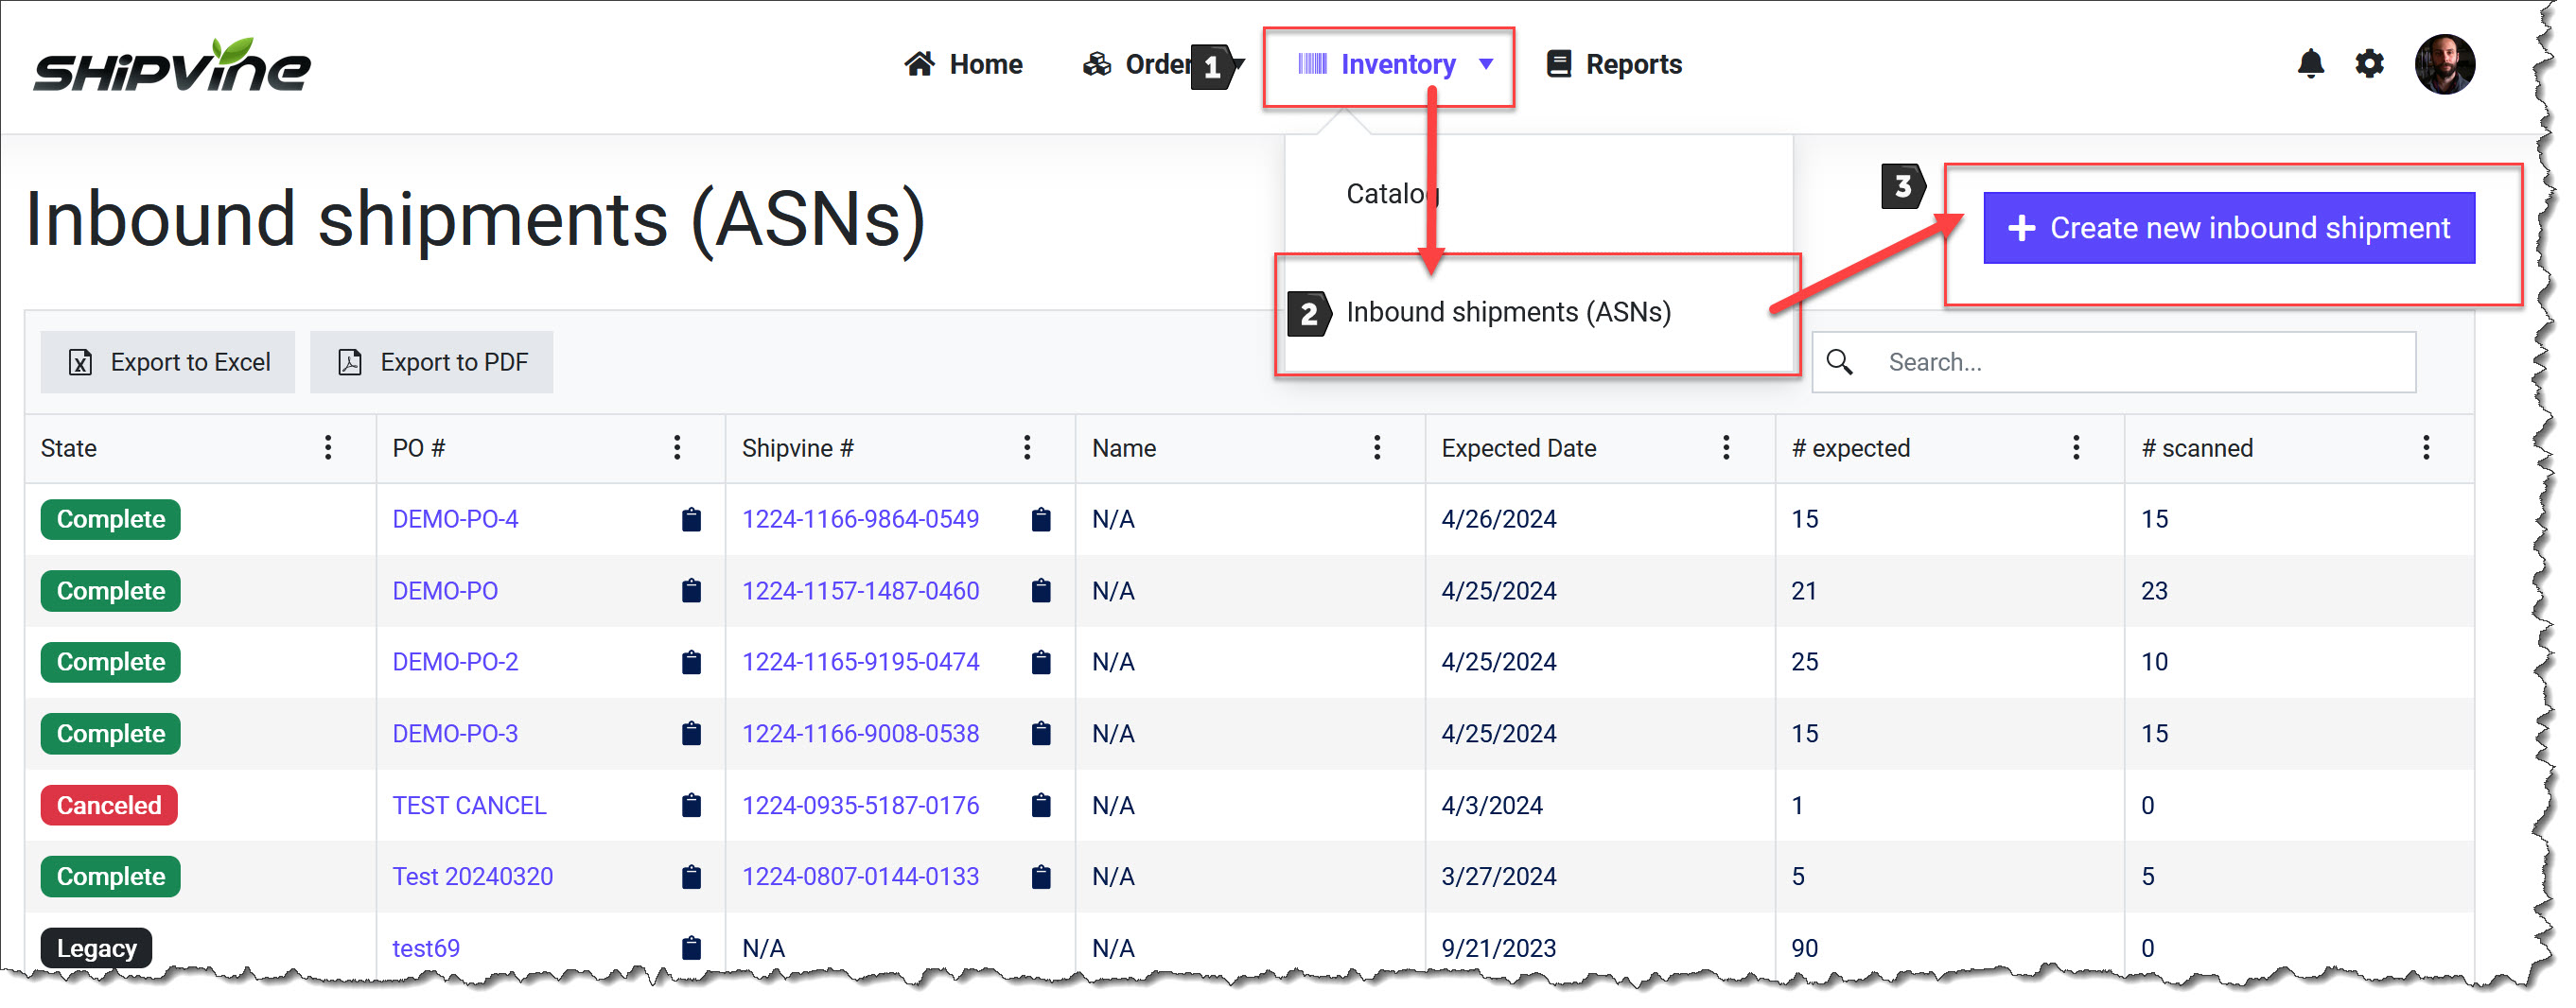
The first step is to enter the inbound shipment in the Shipvine Client Portal. To do that, click on the "Inventory" menu, and click on "Inbound Shipments". Then, click "Create new inbound shipment", or bookmark this page.
Take a look at what the new page looks like:
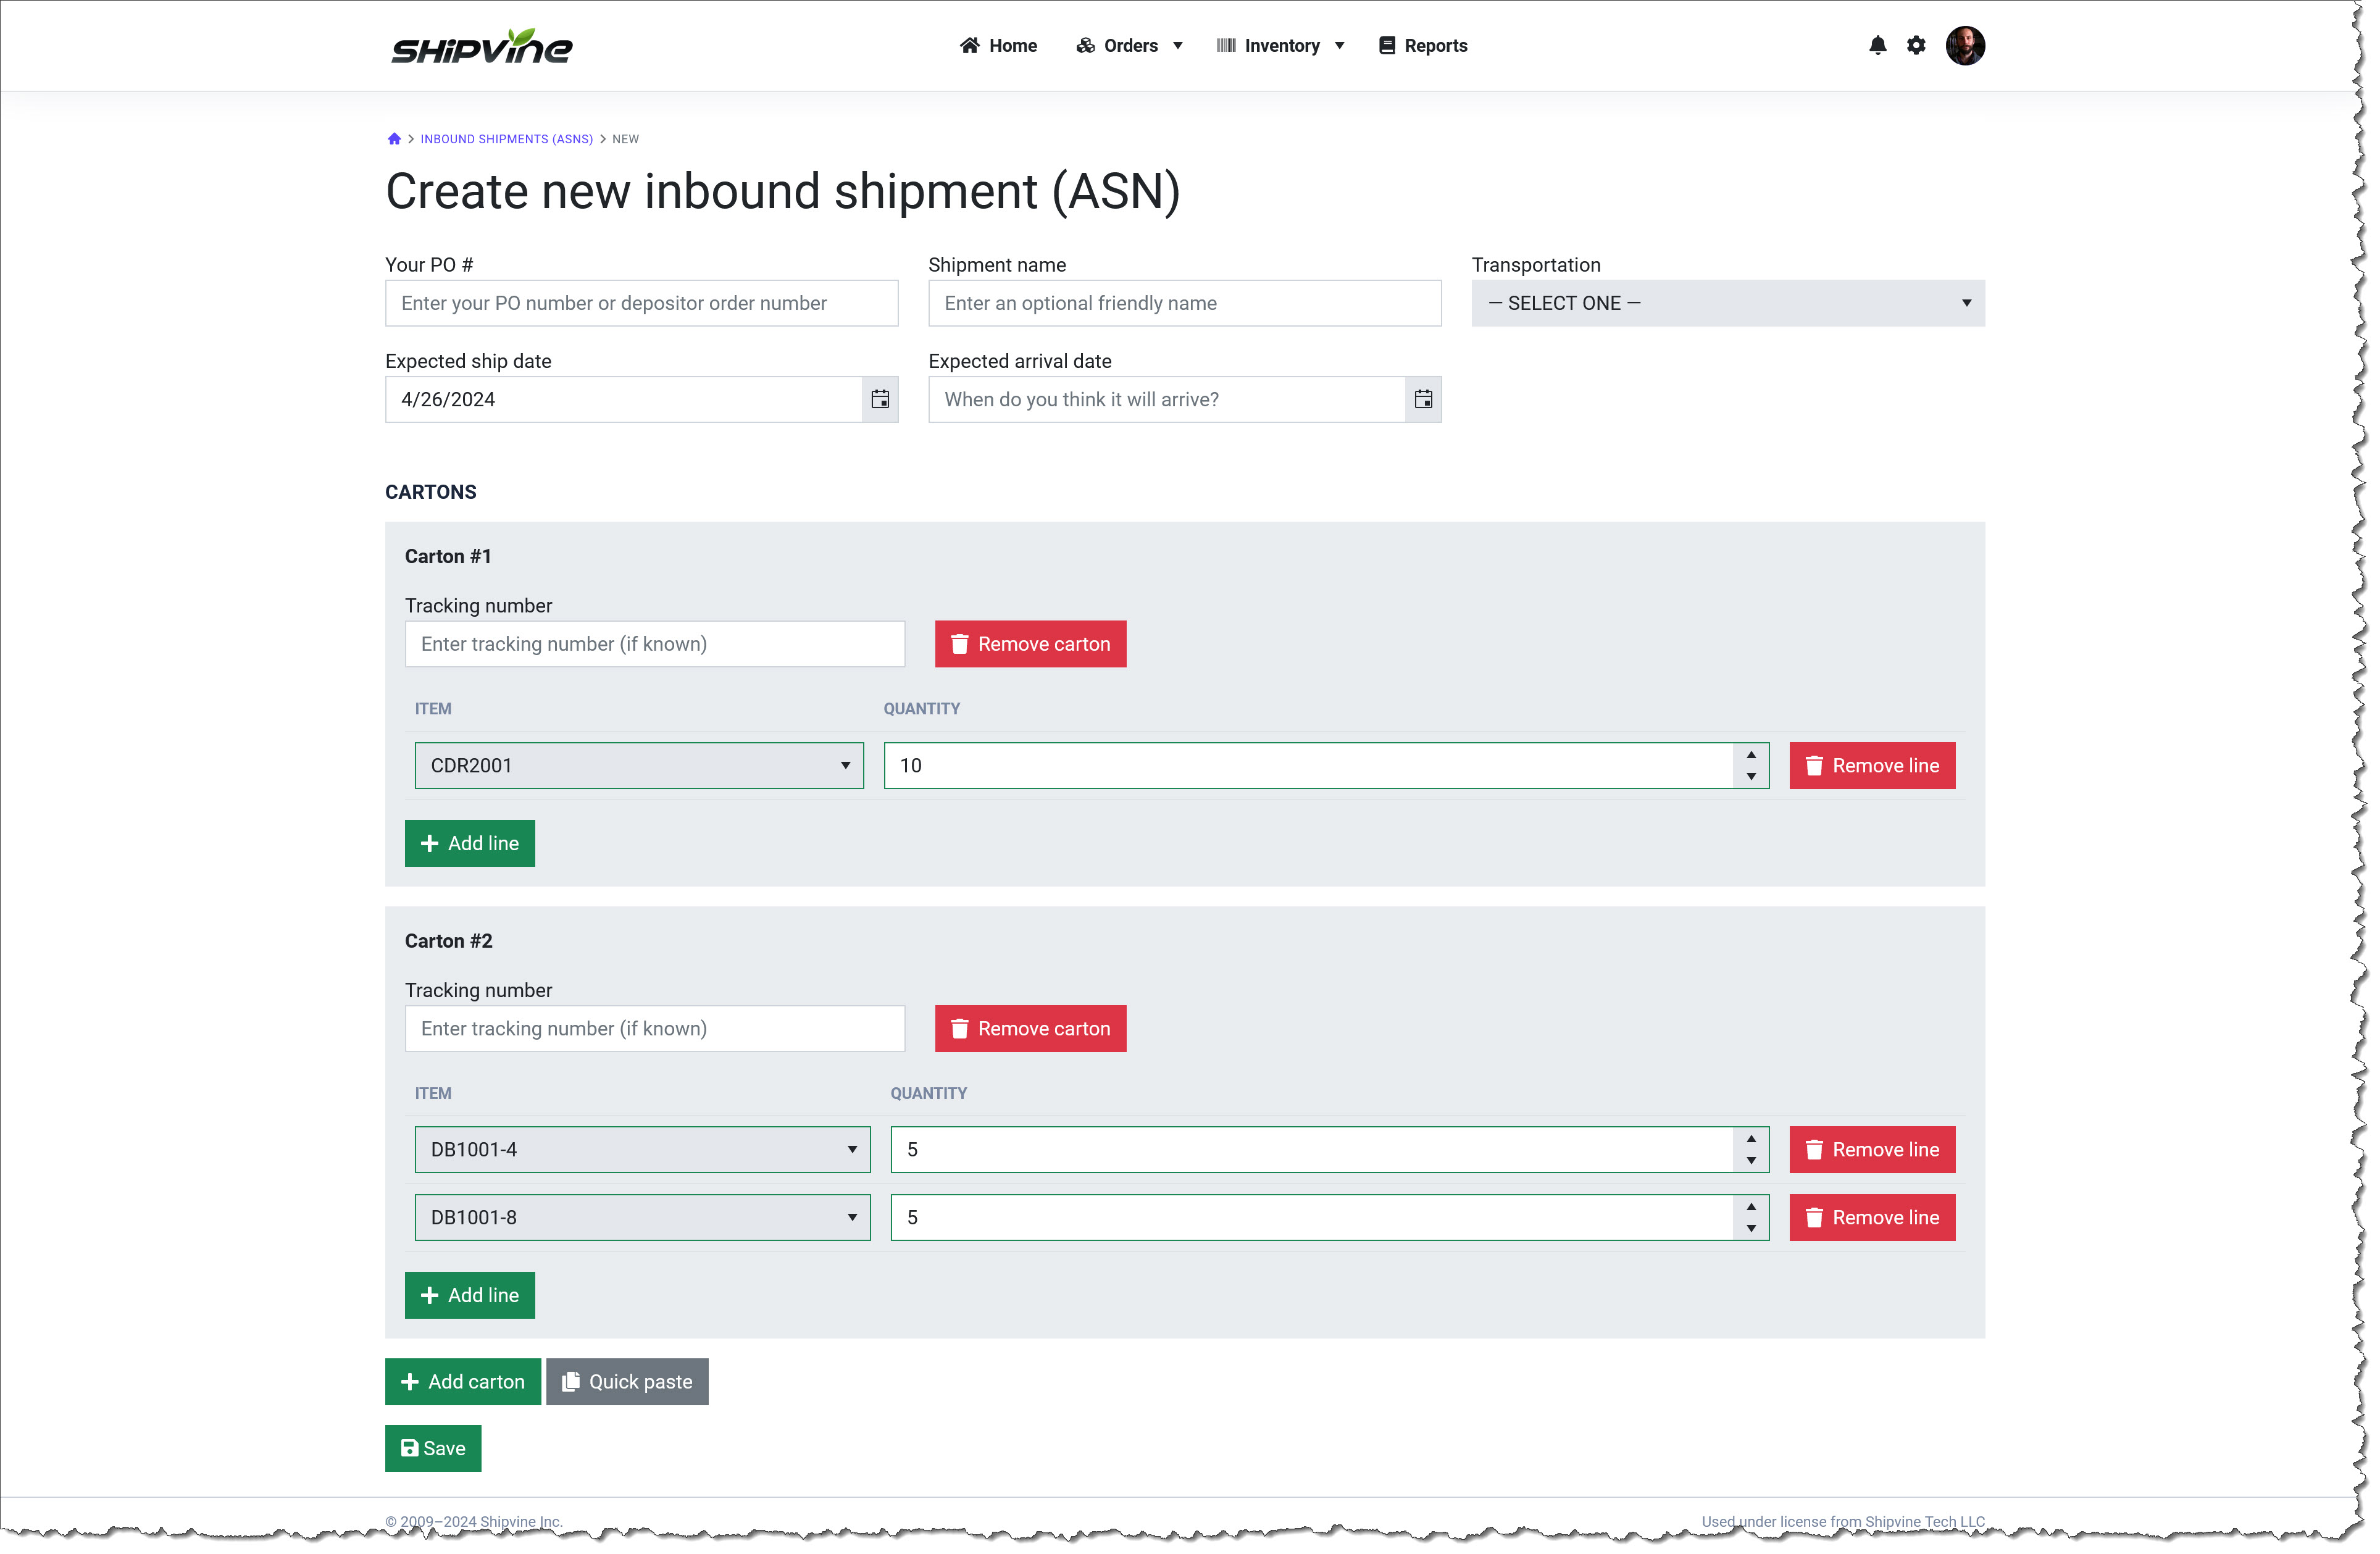
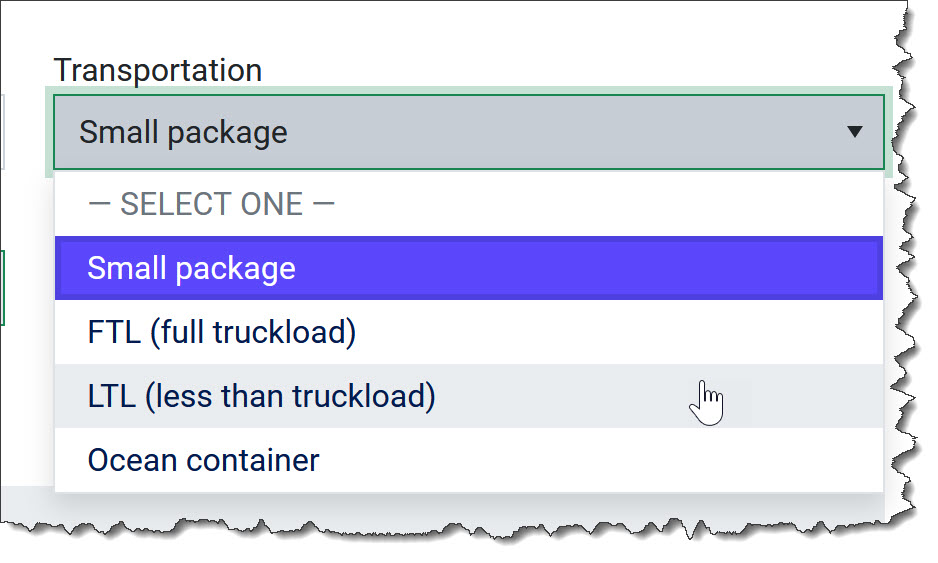
You'll notice that there's a new dropdown labeled "Transportation". To help us plan better, we're asking about how this shipment is going to arrive at Shipvine.
We're also asking you to estimate an "Expected ship date" in addition to the "Expected arrival date". These don't have to be exact, but please give us the same information you are using in your own planning.

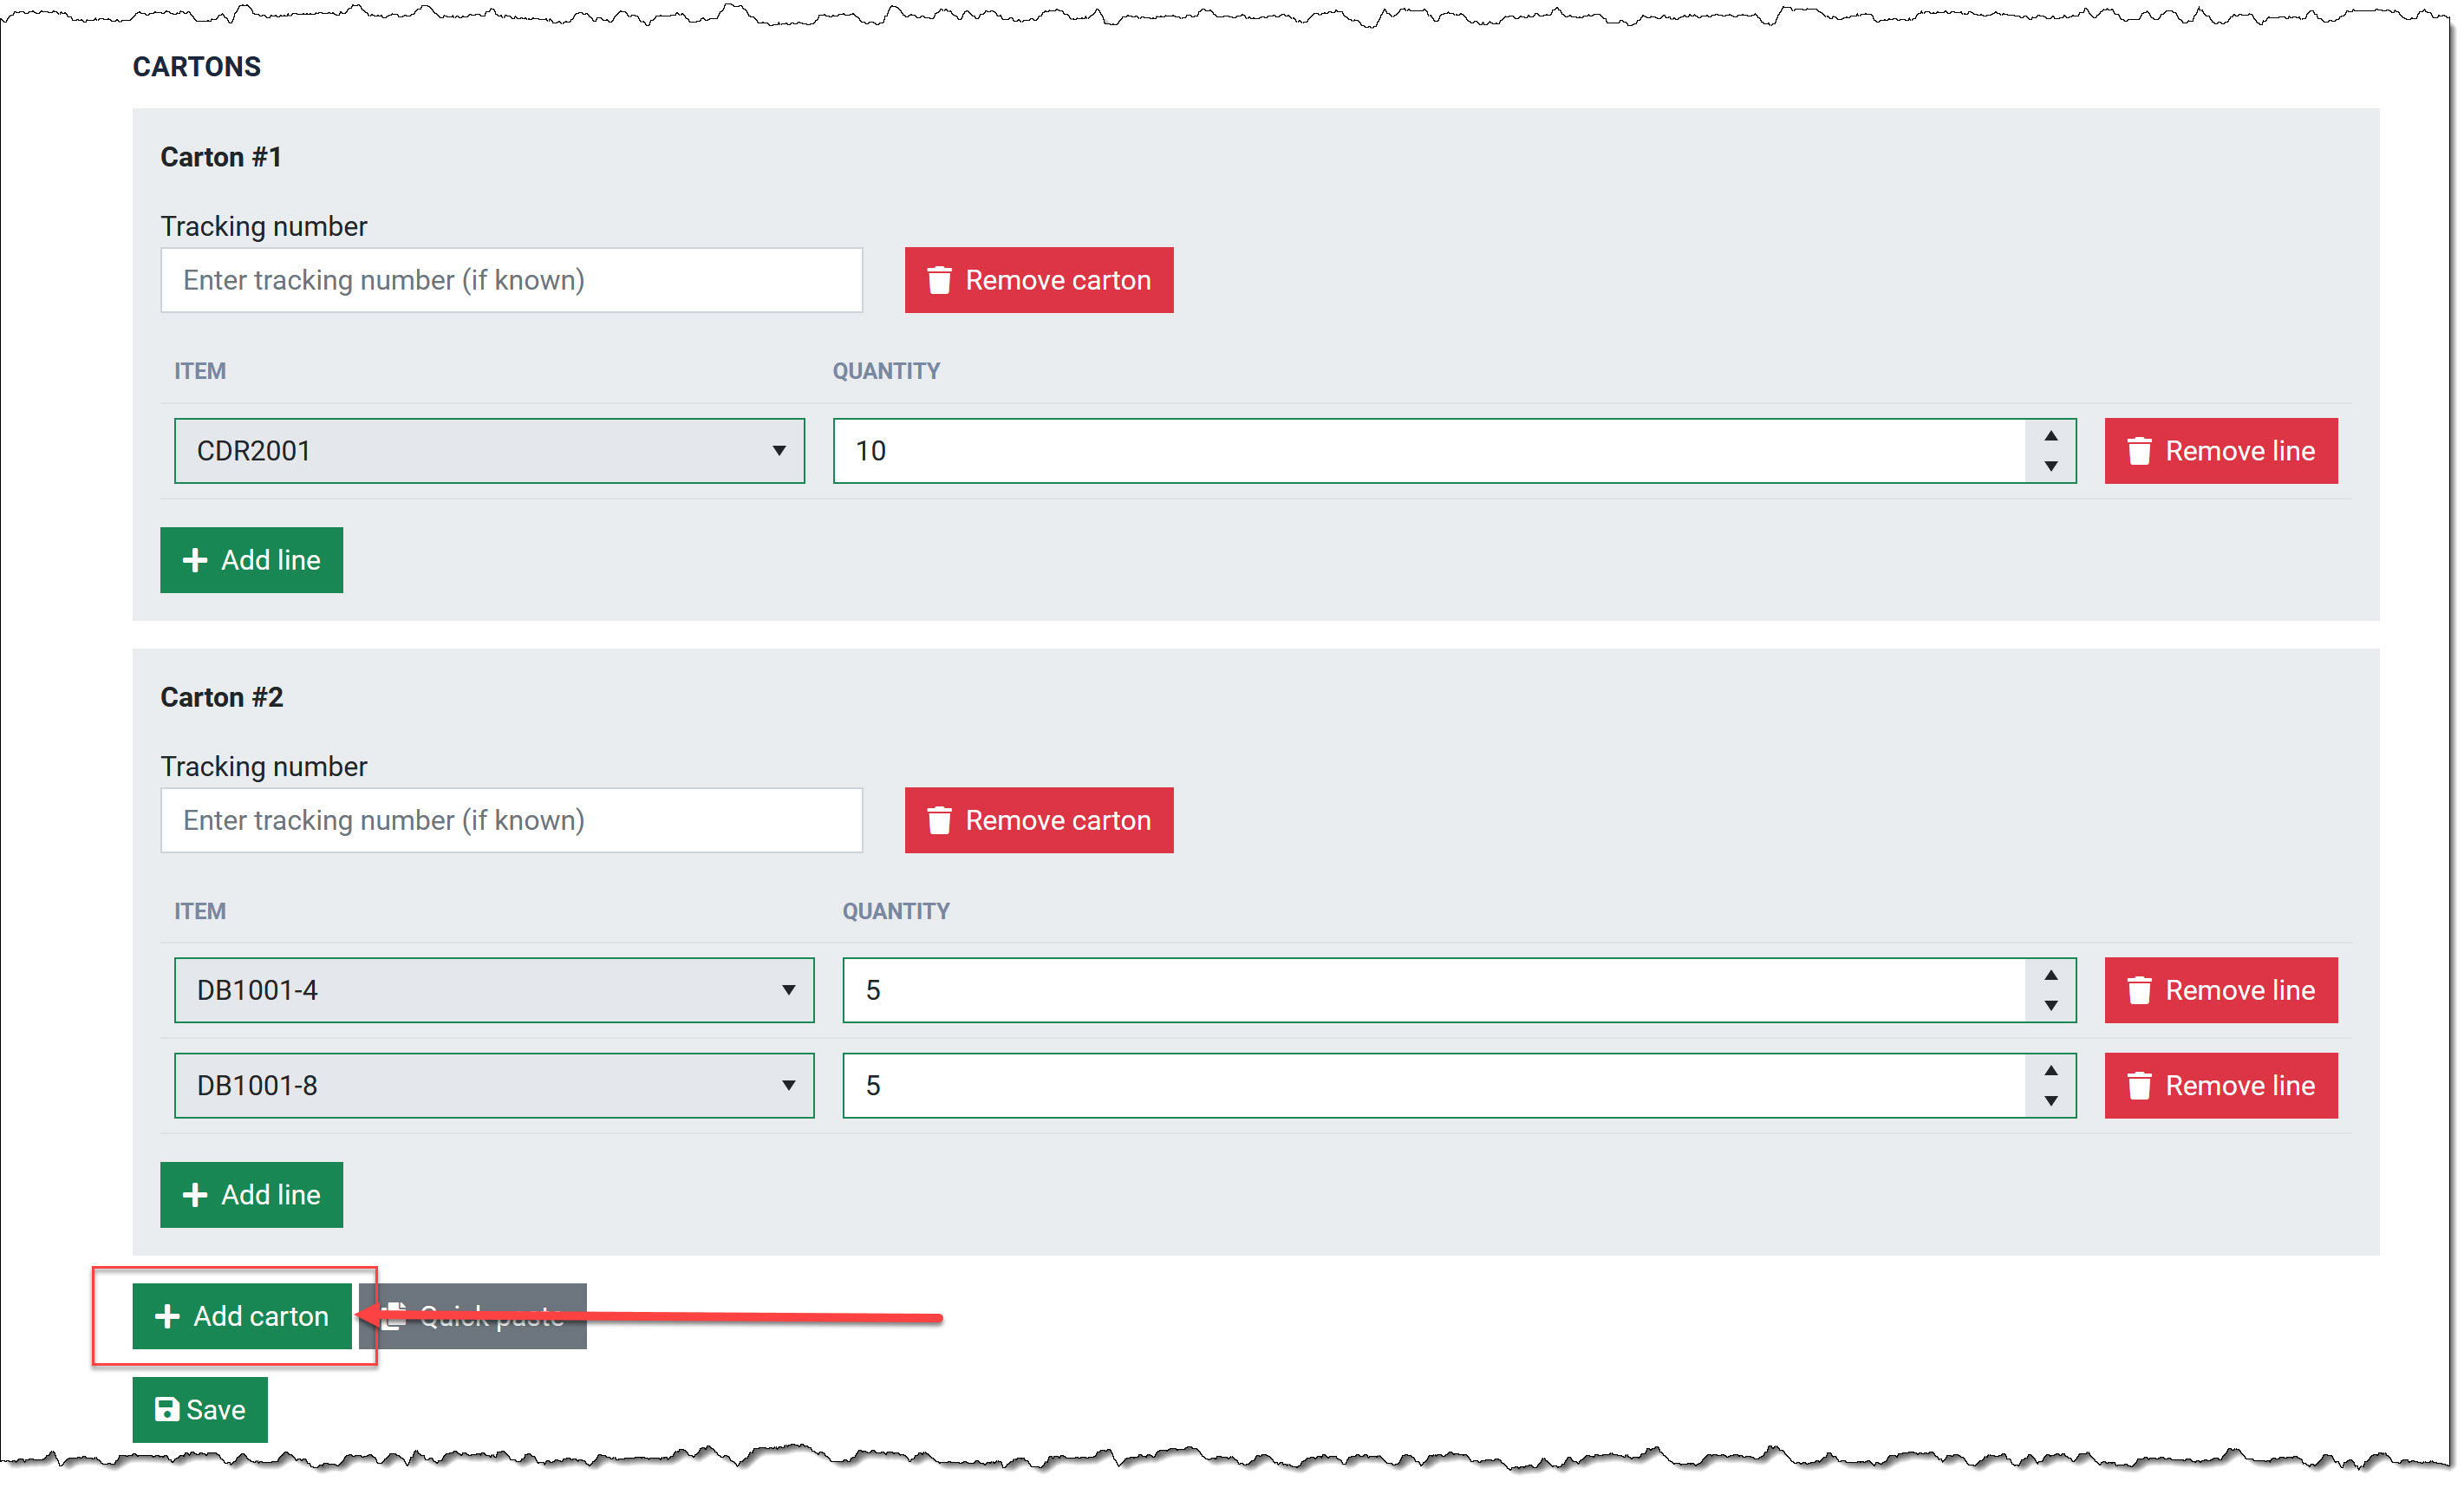
Finally, you'll notice that the orientation toward carton-based receiving is much more explicit. First you add a carton, and then you add the lines in each carton. If you already know the tracking number, you can paste that info in now, but you can also provide it later.
In the example below, I've entered two cartons. One carton has a single SKU or item in it, which is how we prefer it for expedited receiving. The other carton has multiple SKUs and is a mixed carton. While mixed cartons do not automatically incur additional receiving charges, they may get upgraded to $2/carton receiving if the SKUs are not neatly packed and separated.
This inbound shipment is in the draft state, and you can continue to freely edit it. When you're happy with the contents of the shipment, you can click "Save".
Step 2—Submitting for approval
In the original version of receiving, that was it! You could send the items to Shipvine now. But in the new receiving process, there are some extra steps to ensure that we can process your shipment efficiently and accurately.
The first thing you will notice is a yellow banner indicating that you are not authorized to send the items to Shipvine yet. To get authorization, you need to submit this inbound shipment for approval:

When you click the "Submit for approval" button, you're asked to fill out a short questionnaire. The questionnaire is to help guide our clients into making smart choices. Here's an example of a filled out questionnaire:
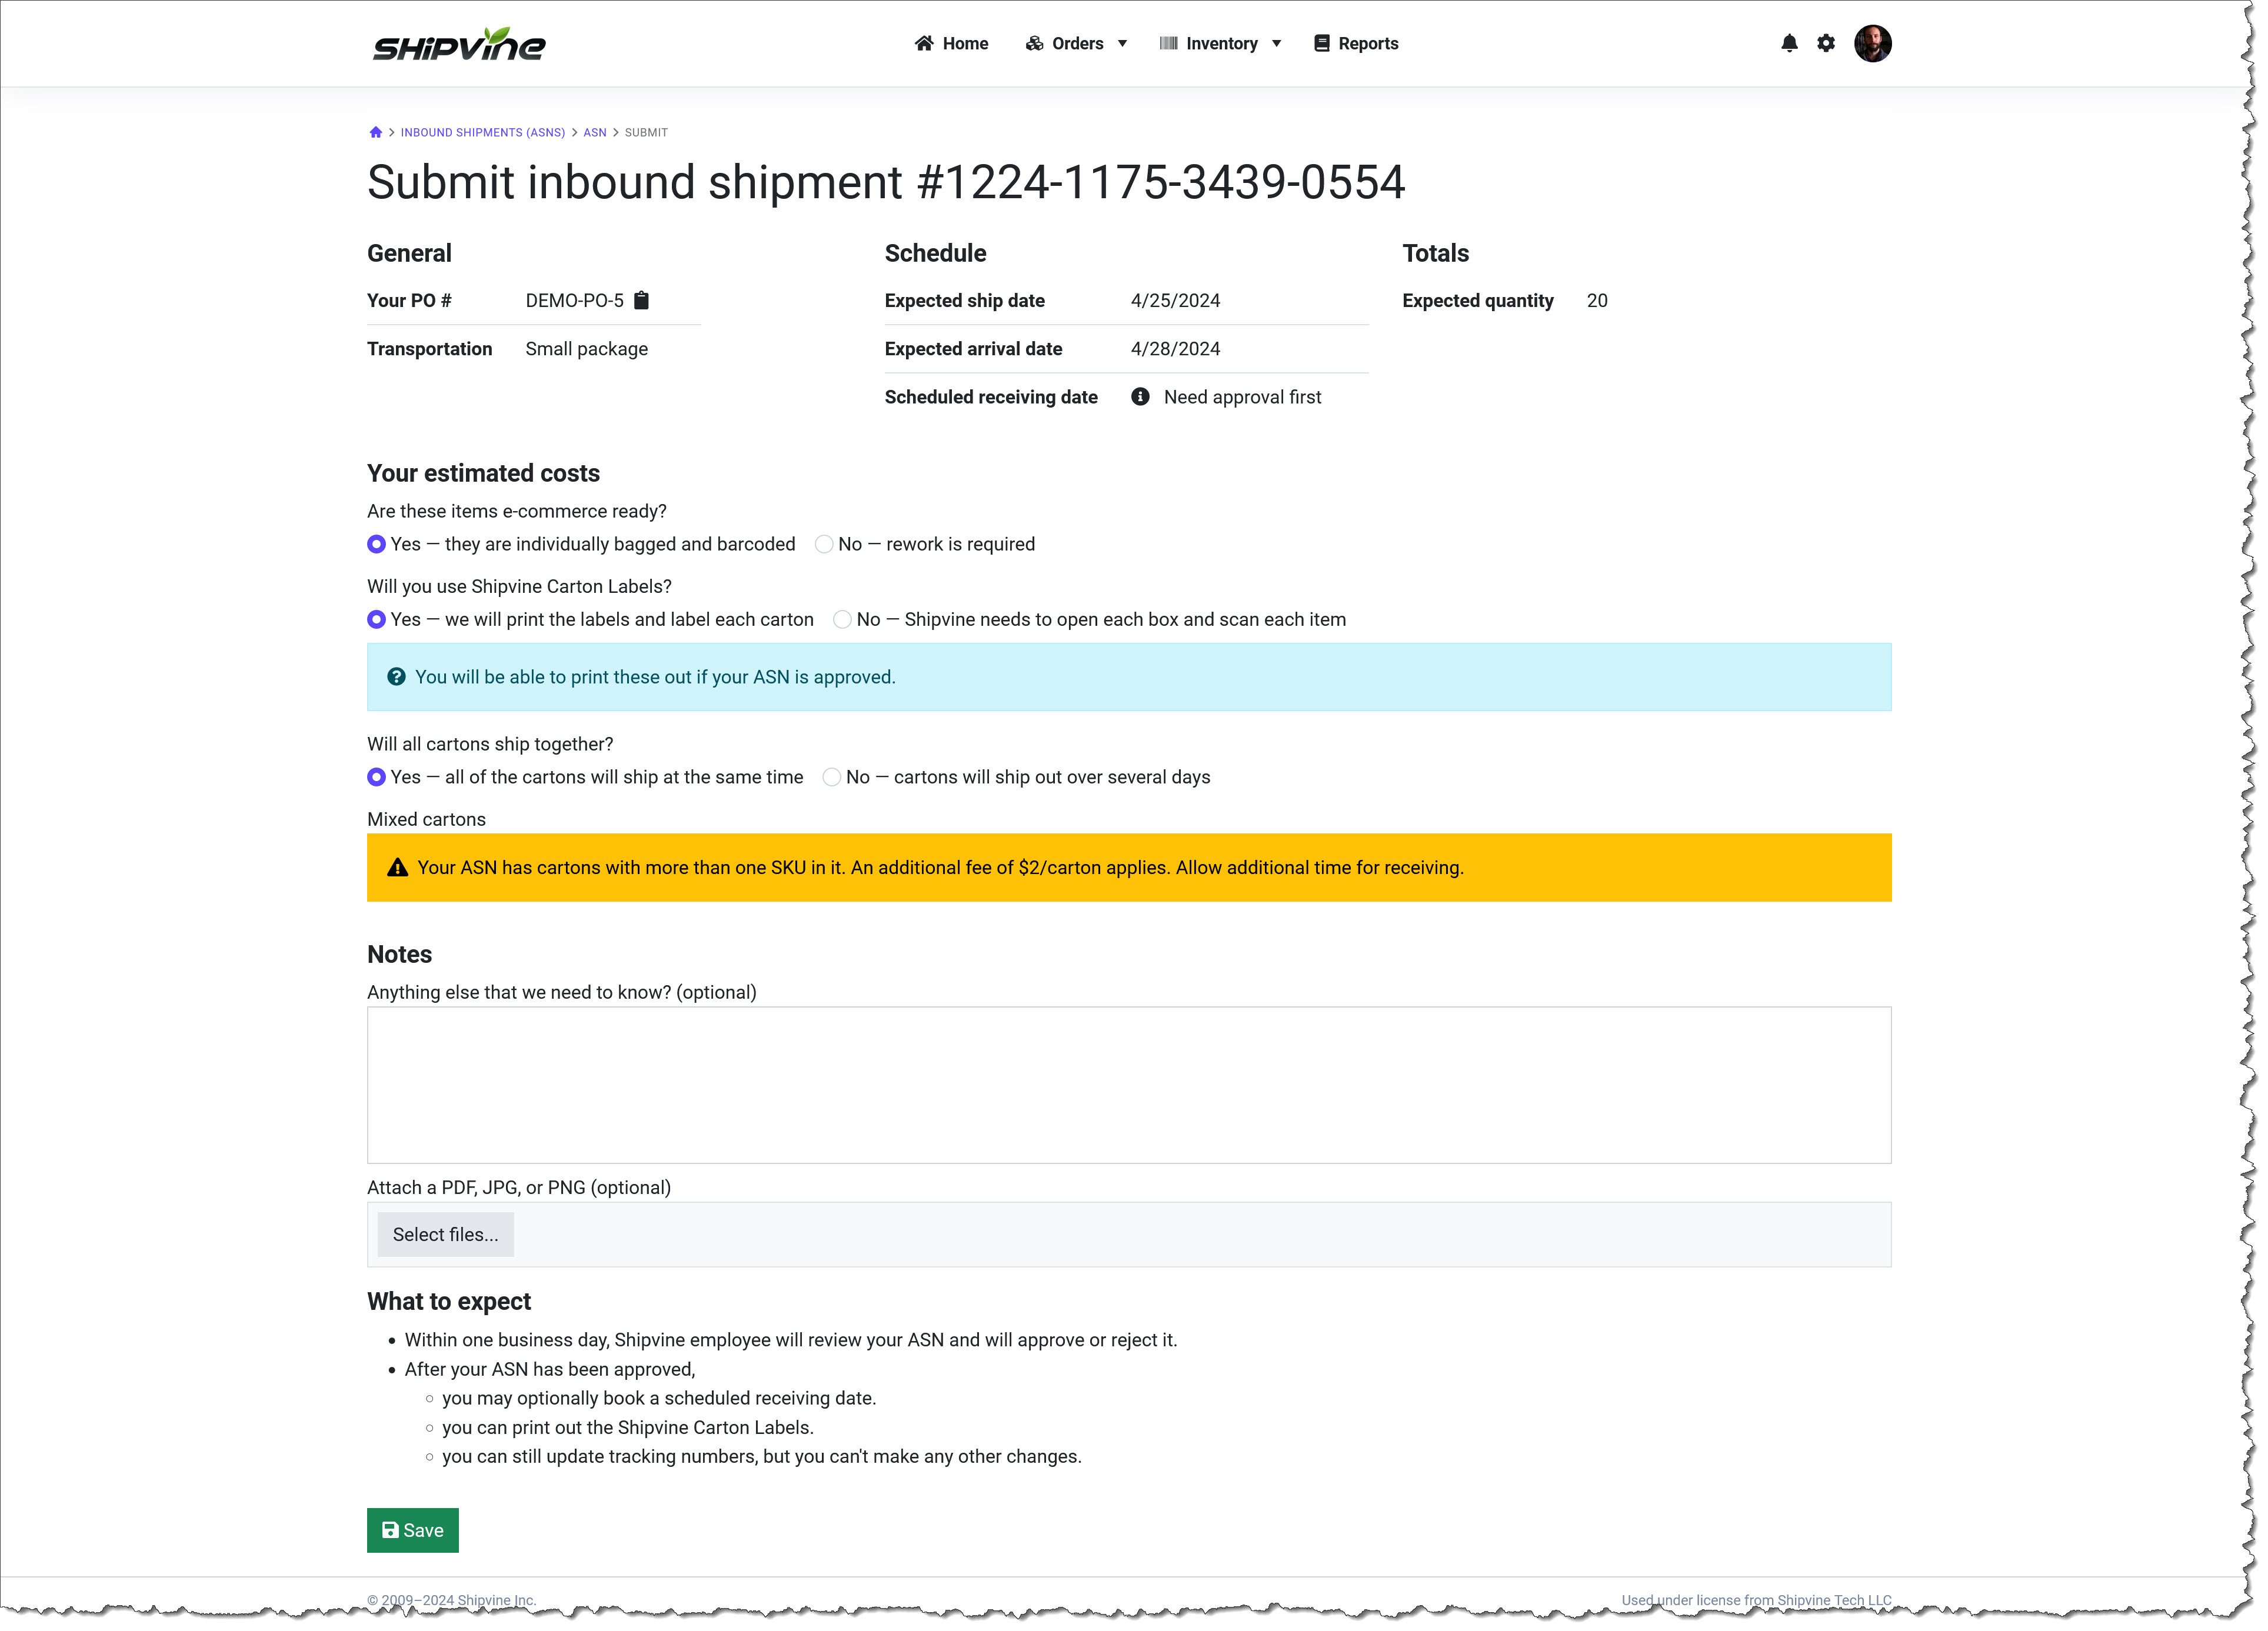
Upon hitting "Save", the inbound shipment transitions to the submitted state.
You're still not quite ready to send the items to Shipvine. Shipvine employees monitor an approval queue each business day, and, in the vast majority of cases, will approve your inbound shipment. You can get an email notification about the approval by navigating to your Notification Preferences and setting the "Inbound shipment approved" setting to "Send an email immediately", like this:

Step 4—Printing Shipvine Carton Labels
If we navigate back to our inbound shipment, we can see that it is now in the approved state, and we have different buttons available.
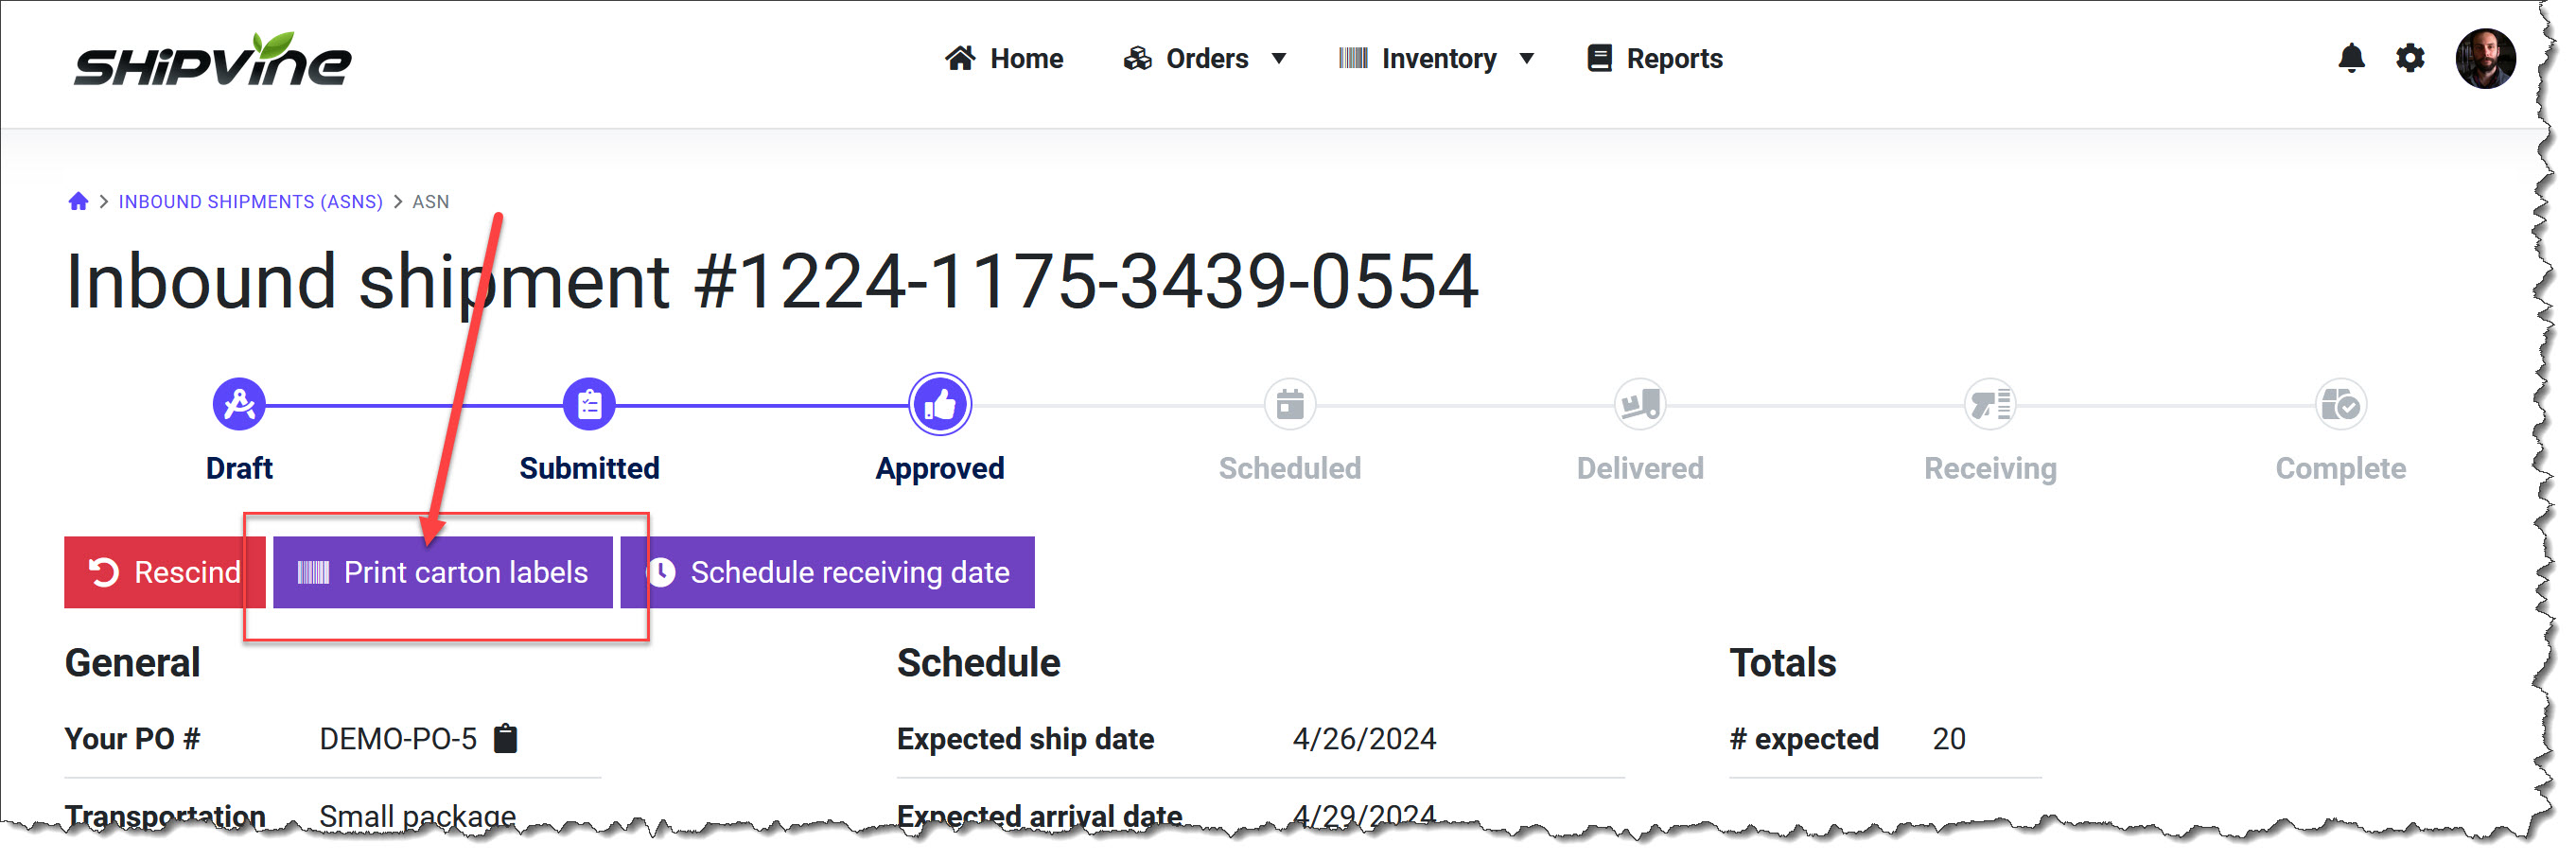
The "Rescind" button is used if you need to make changes to the carton manifest of the inbound. Since you submitted it for approval, it's locked down now. So if you need to make changes, press "Rescind" and then go through the approval process again.
Let's continue with printing Shipvine Carton Labels, which are special labels that you apply to the cartons that you are sending to Shipvine to help us expedite the receiving process.
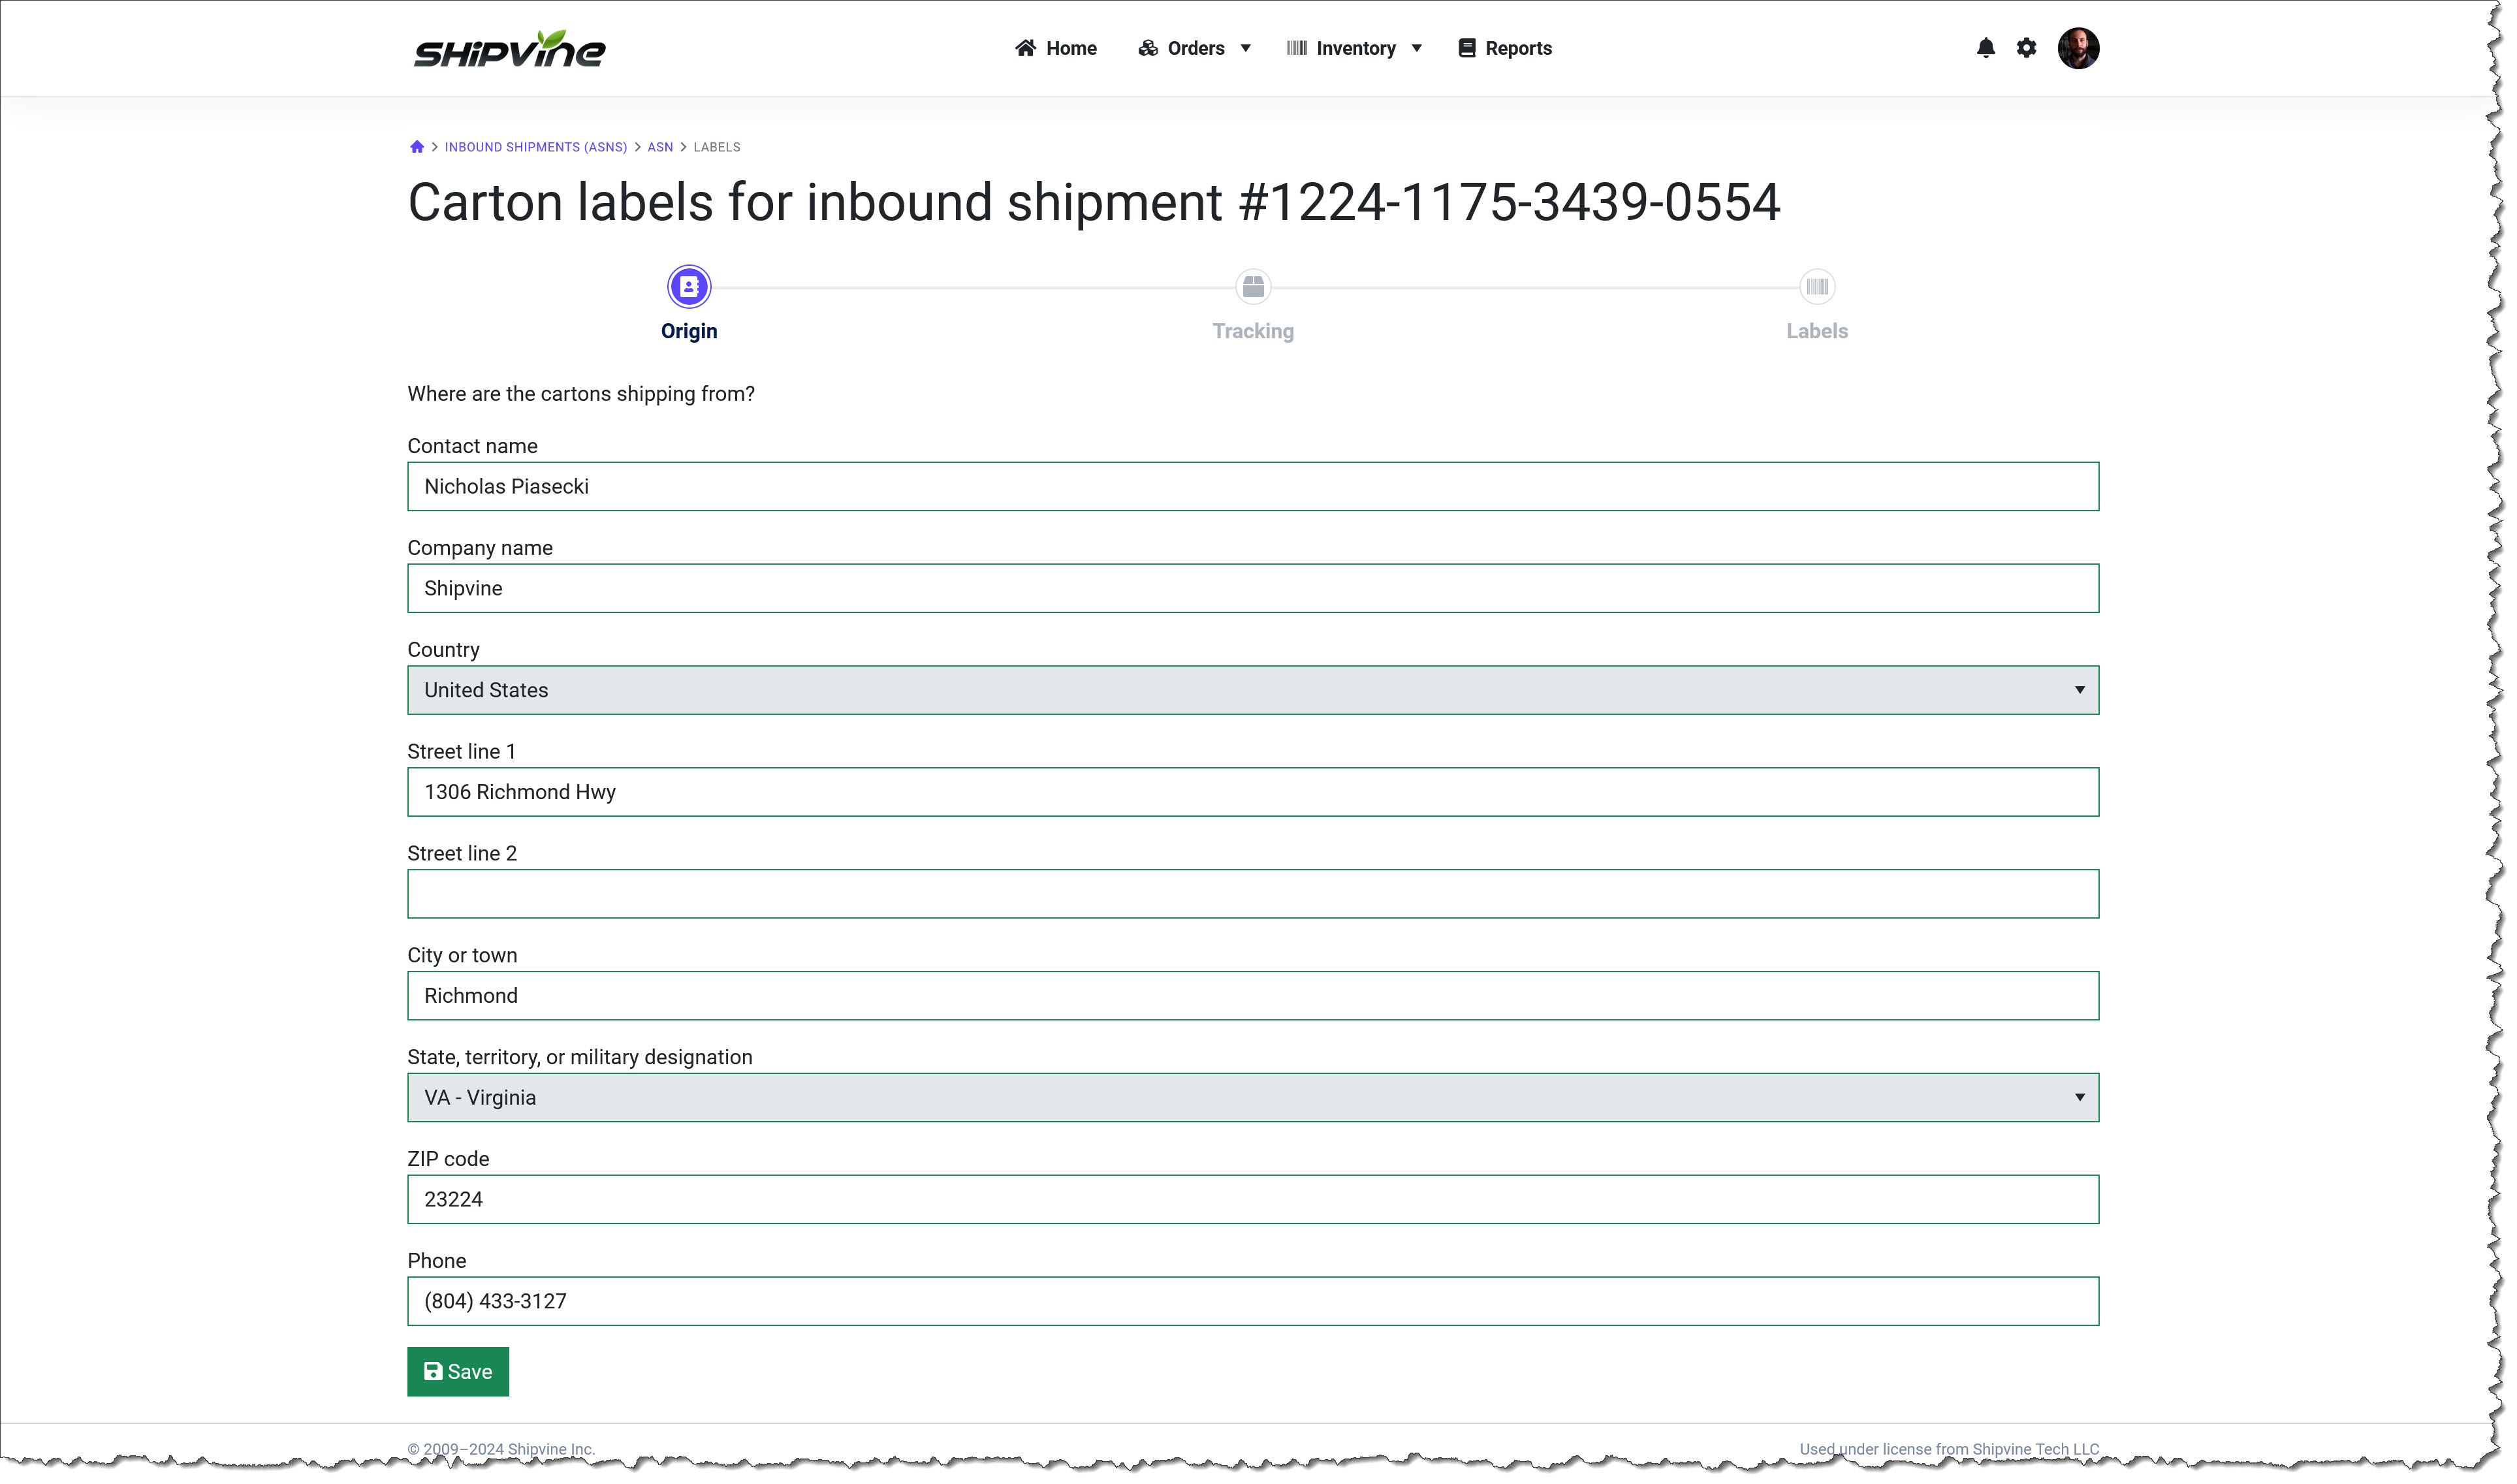
First, we enter the address that we are shipping from:
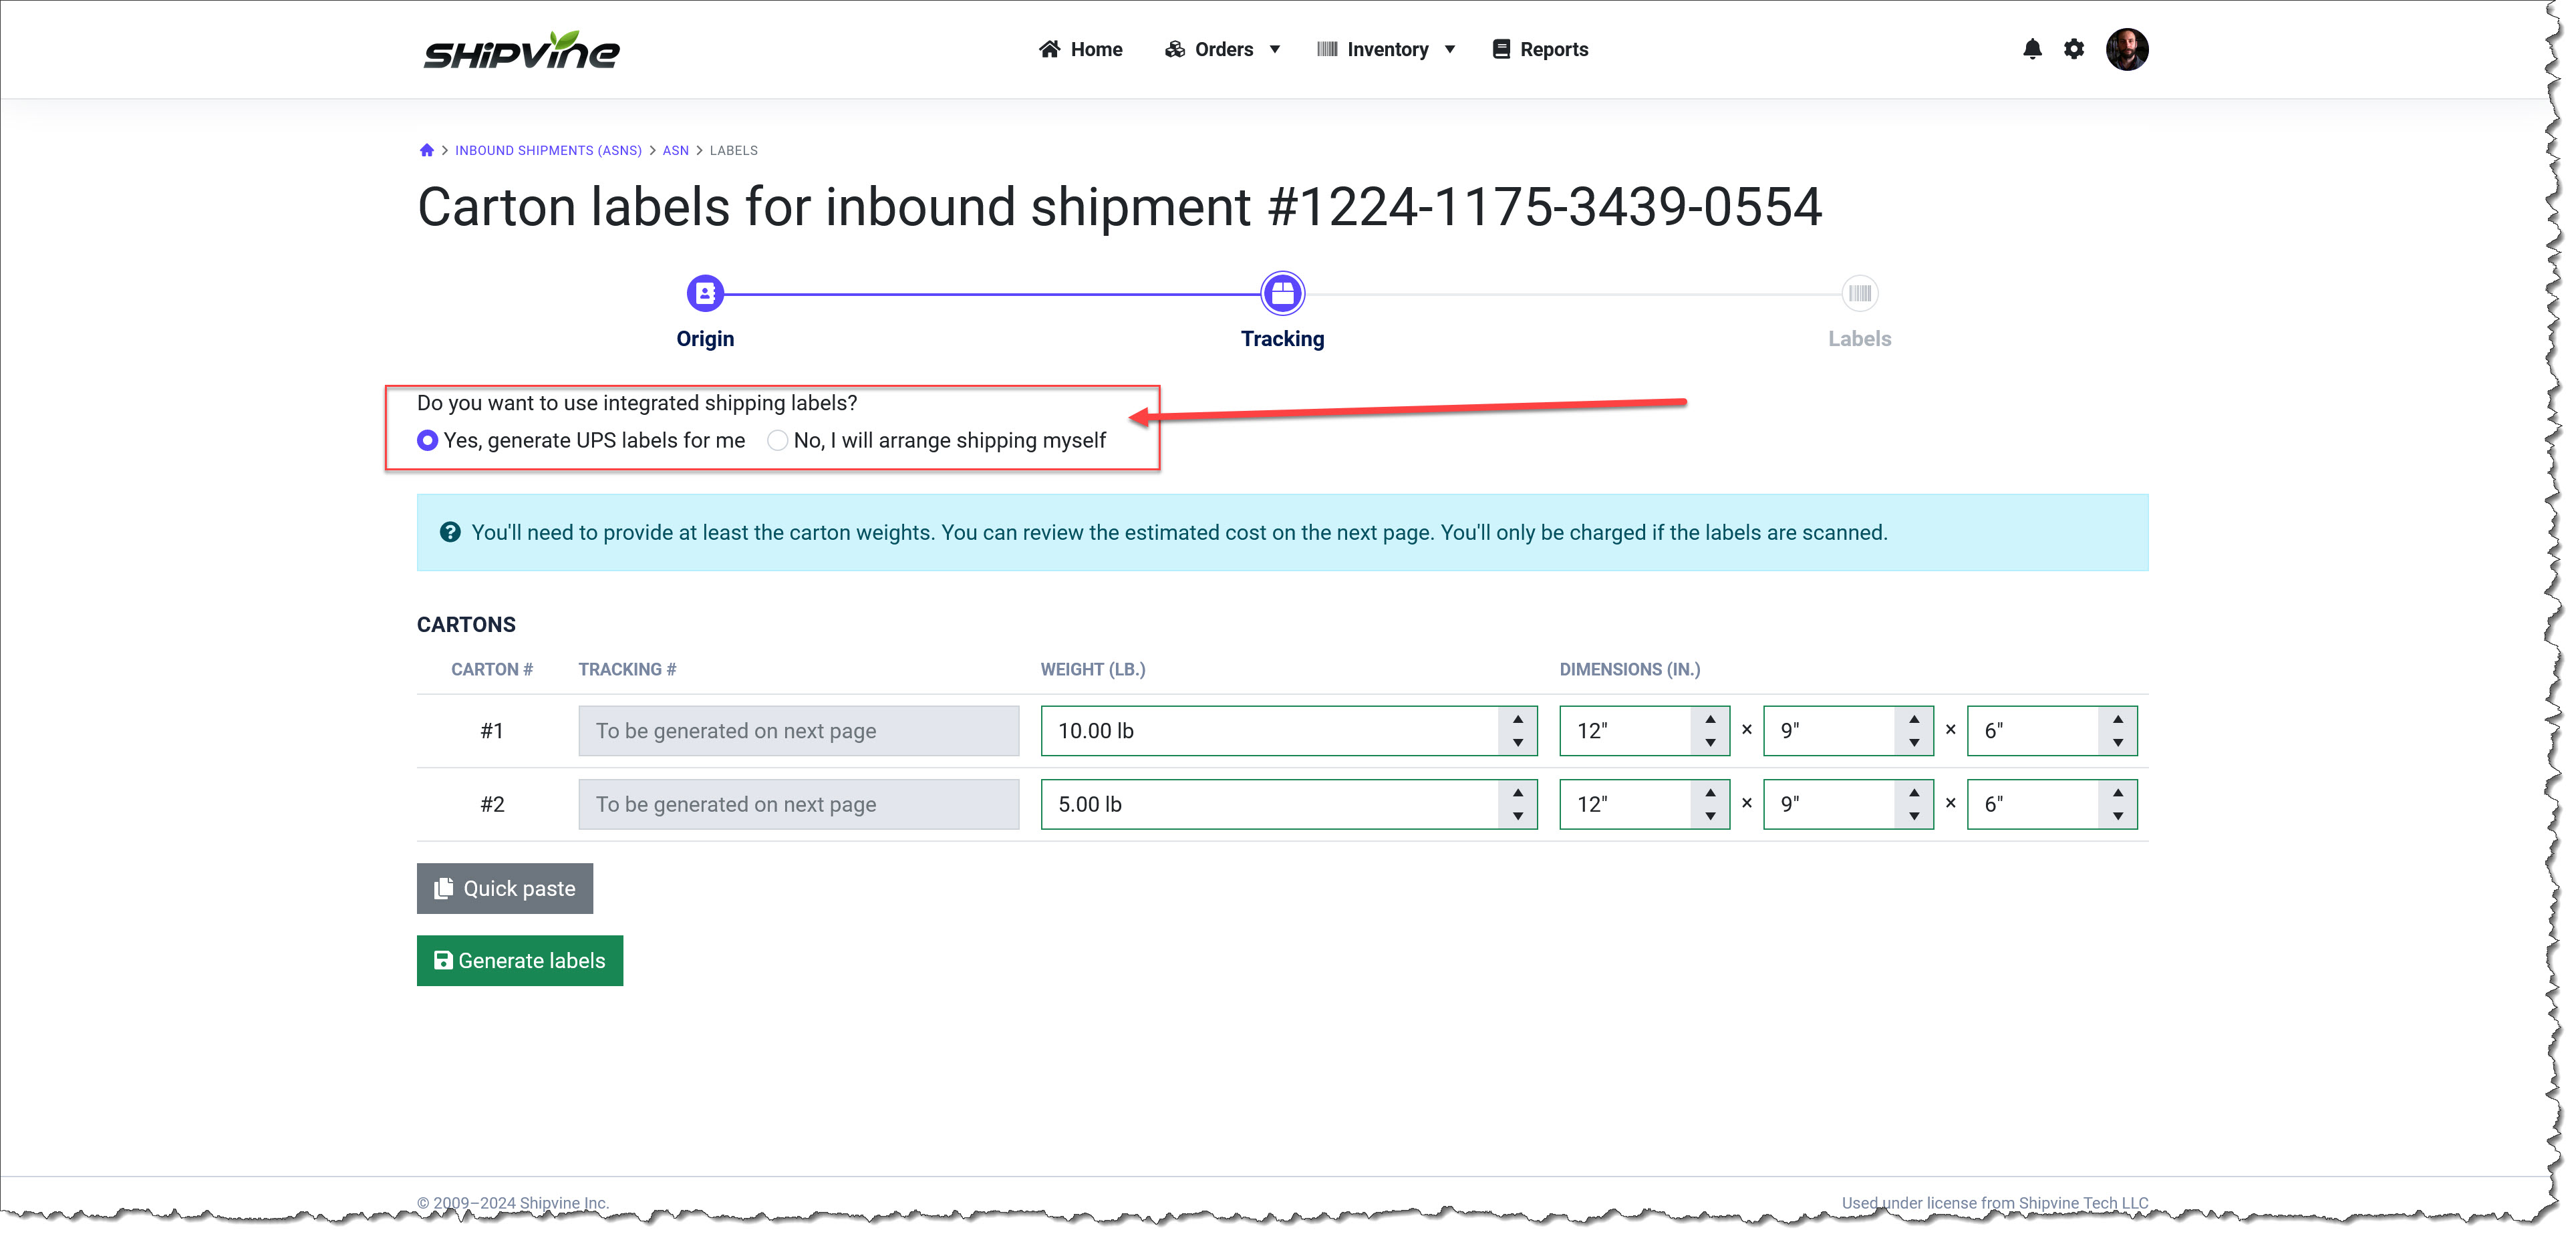
The next page asks for some information about the cartons. This page looks intimidating, but everything is optional.
It is very helpful to Shipvine if you include the carton tracking numbers, but we are understand that in some cases (cartons arriving on pallets via freight or ocean container) this is not possible.
The fields are only required if you decide to use our UPS labels, in which case the weight field is required.
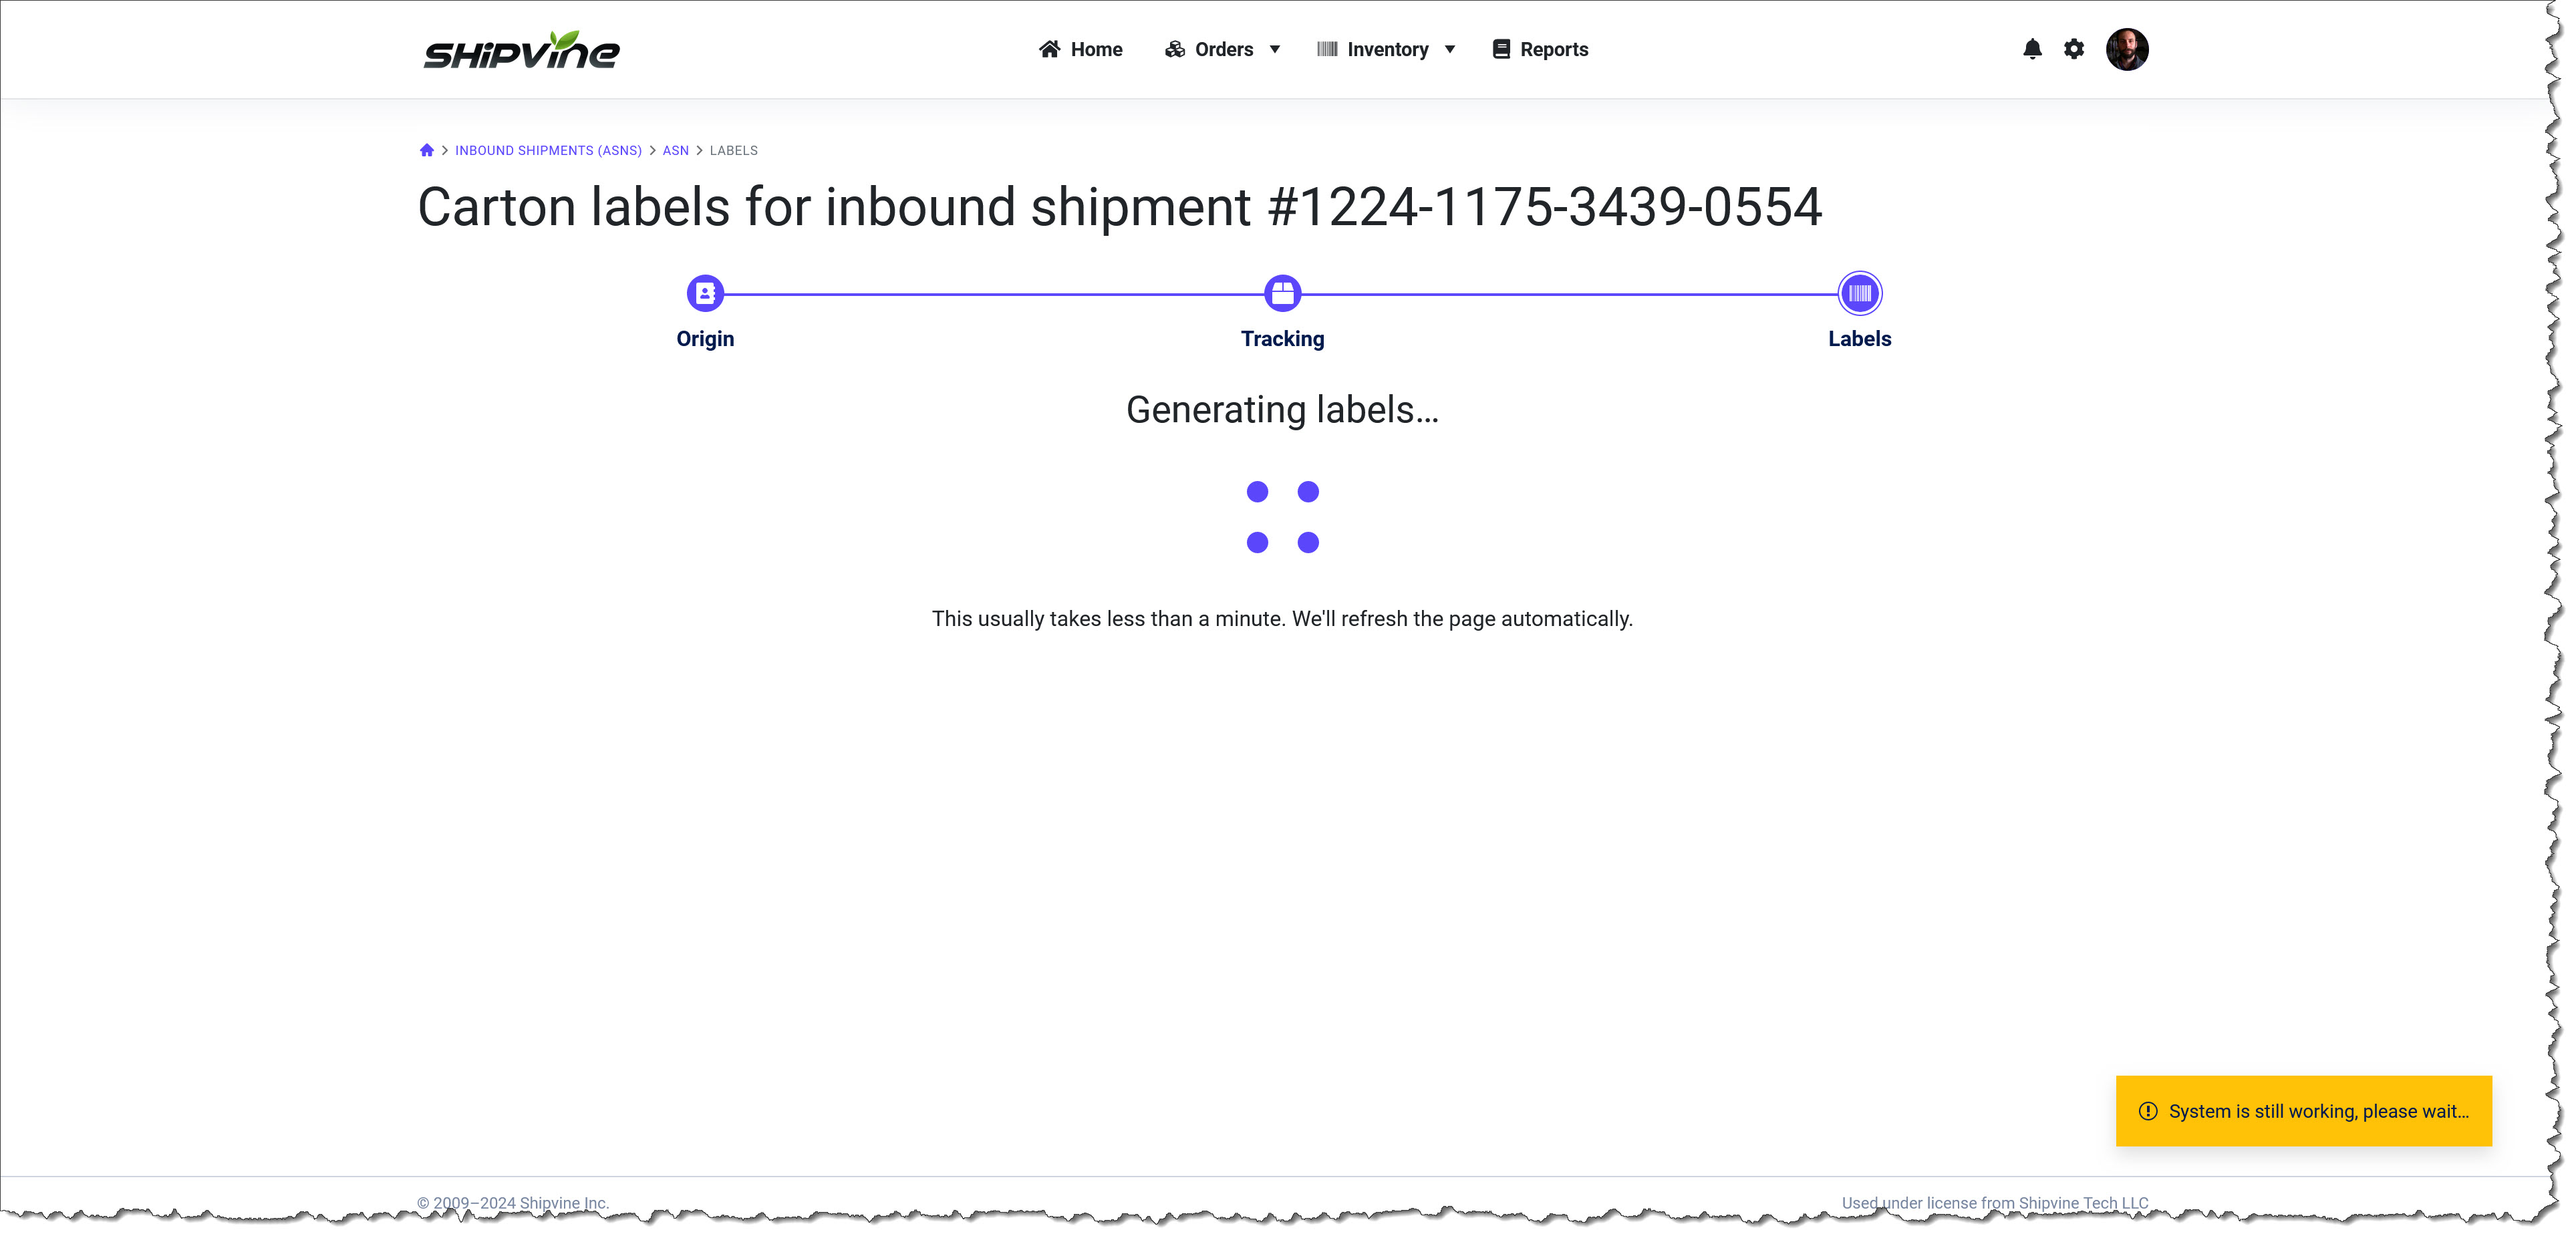
The system will begin generating the labels in the background. It usually takes less than a minute, and the page will automatically refresh itself:
When the labels are ready, you can print them out on either full-size letter paper, or on a label printer. If you opted to use our UPS labels, you'll see the estimated cost (should you use them) and have the option to go back and use labels without them.
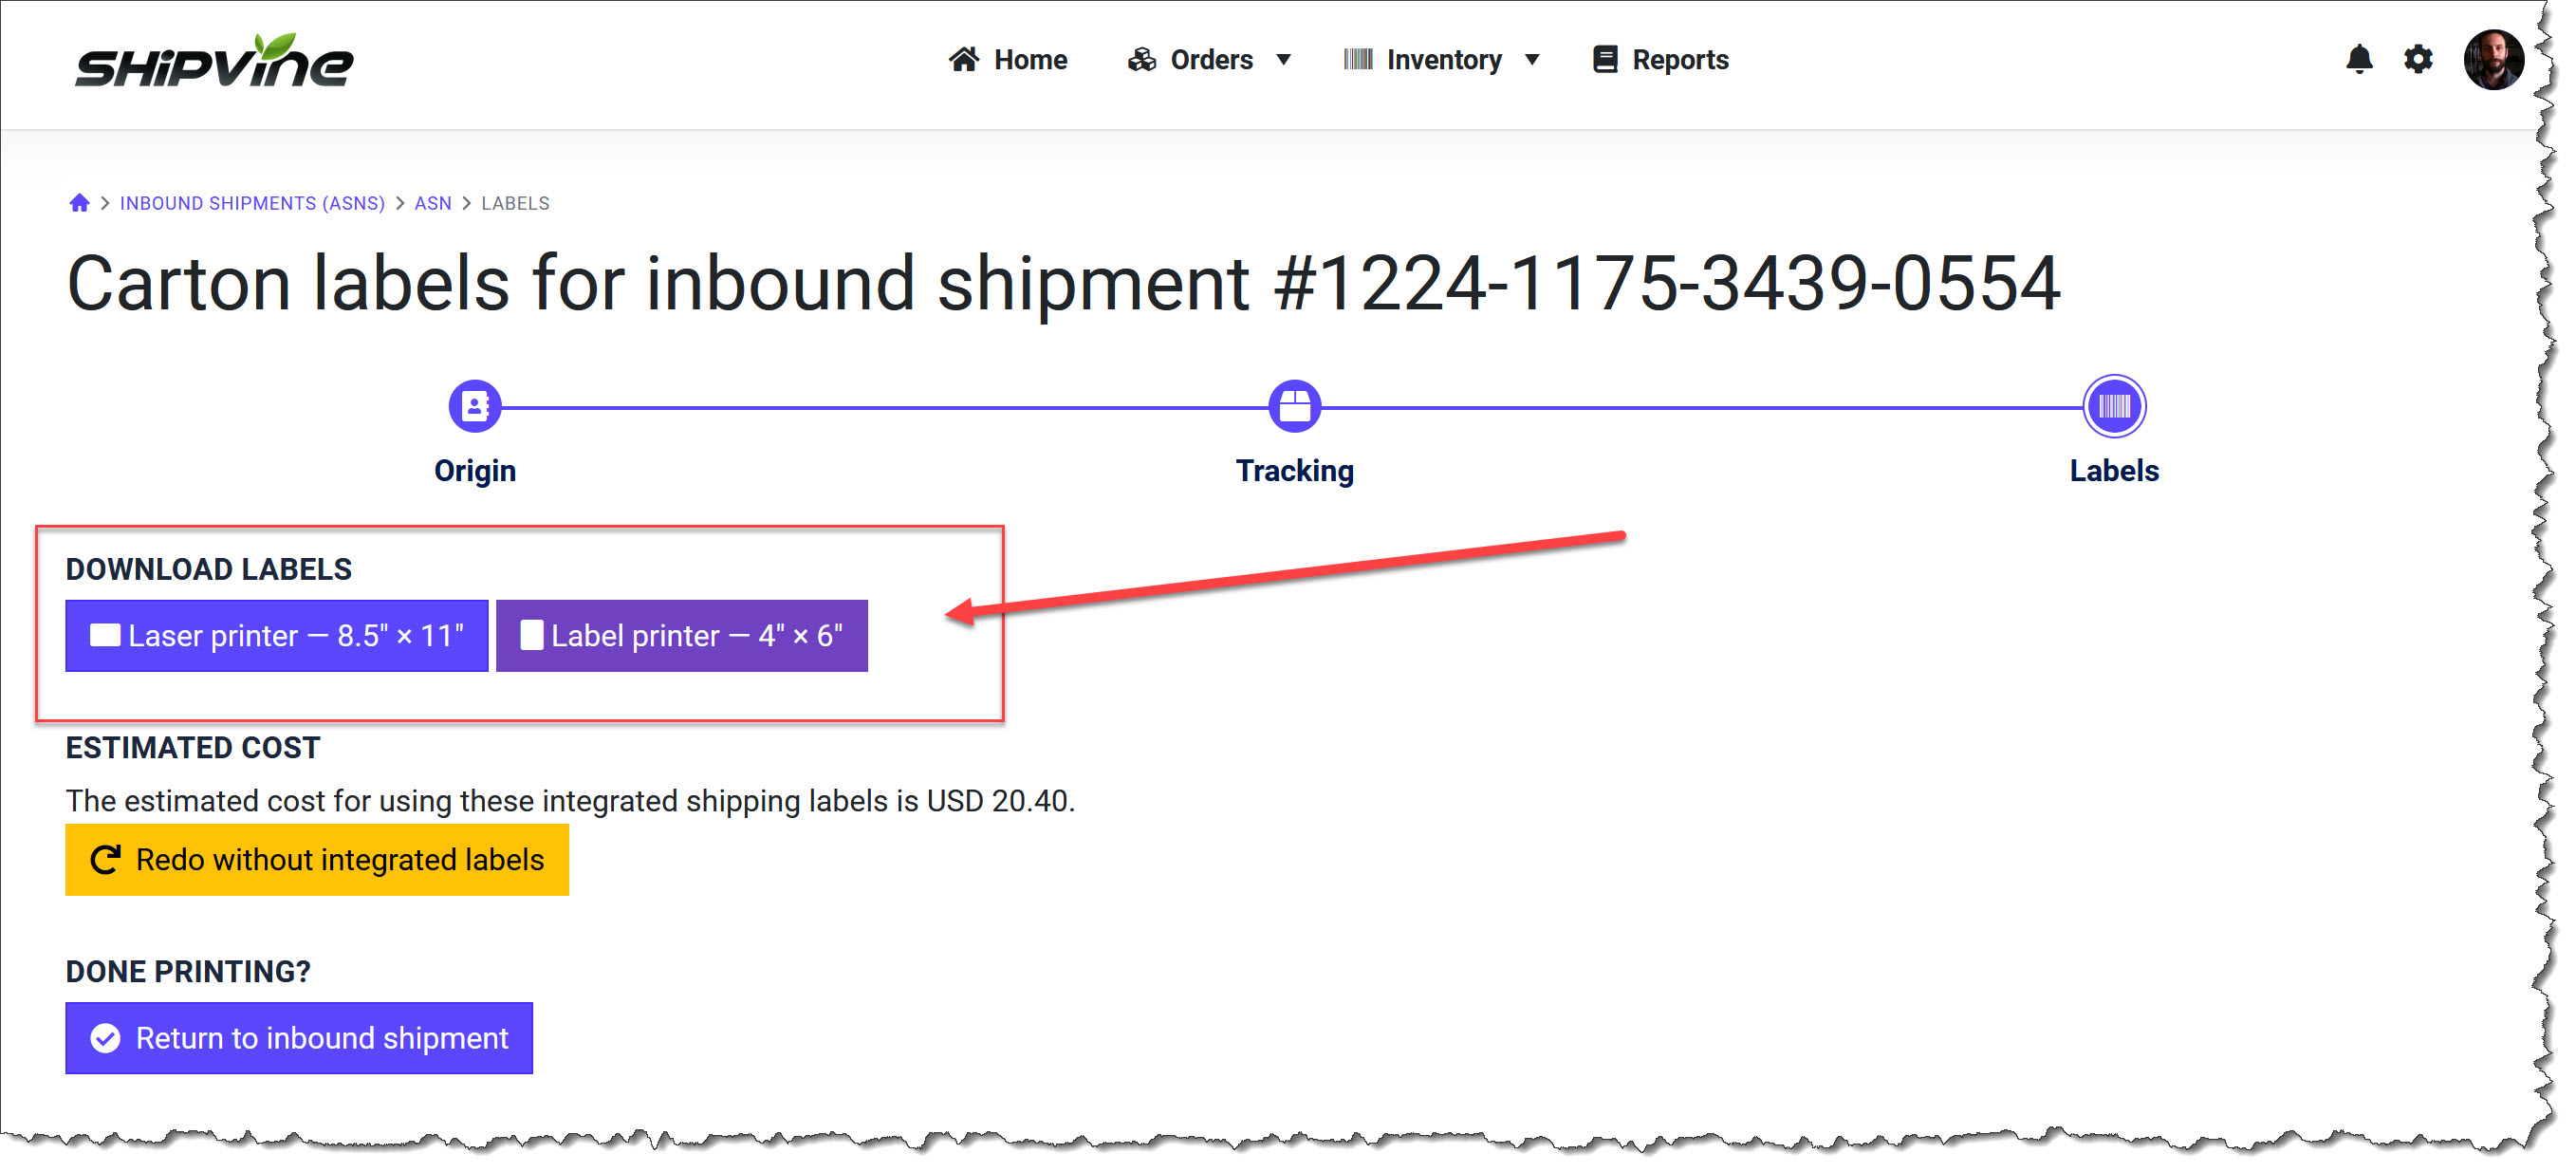
In the example below, I opted for the full page labels with the UPS option. All I would have to do is print this out on a full page label, or tape it to the carton with clear tape, and it's ready to send to Shipvine!

If you decide to not use the UPS labels, then you'd just print out the Shipvine Carton Labels and affix those to the correct boxes. Be sure to match up the carton numbers with what you entered on your manifest!
Step 5—Scheduling your inbound (optional)
A frequent complaint of the historical Shipvine receiving process was a lack of visibility into delivery and the receiving schedule, and we're trying to fix that with this new process.
The last step is to optionally book time on the receiving calendar by clicking the "Schedule receiving date" button:
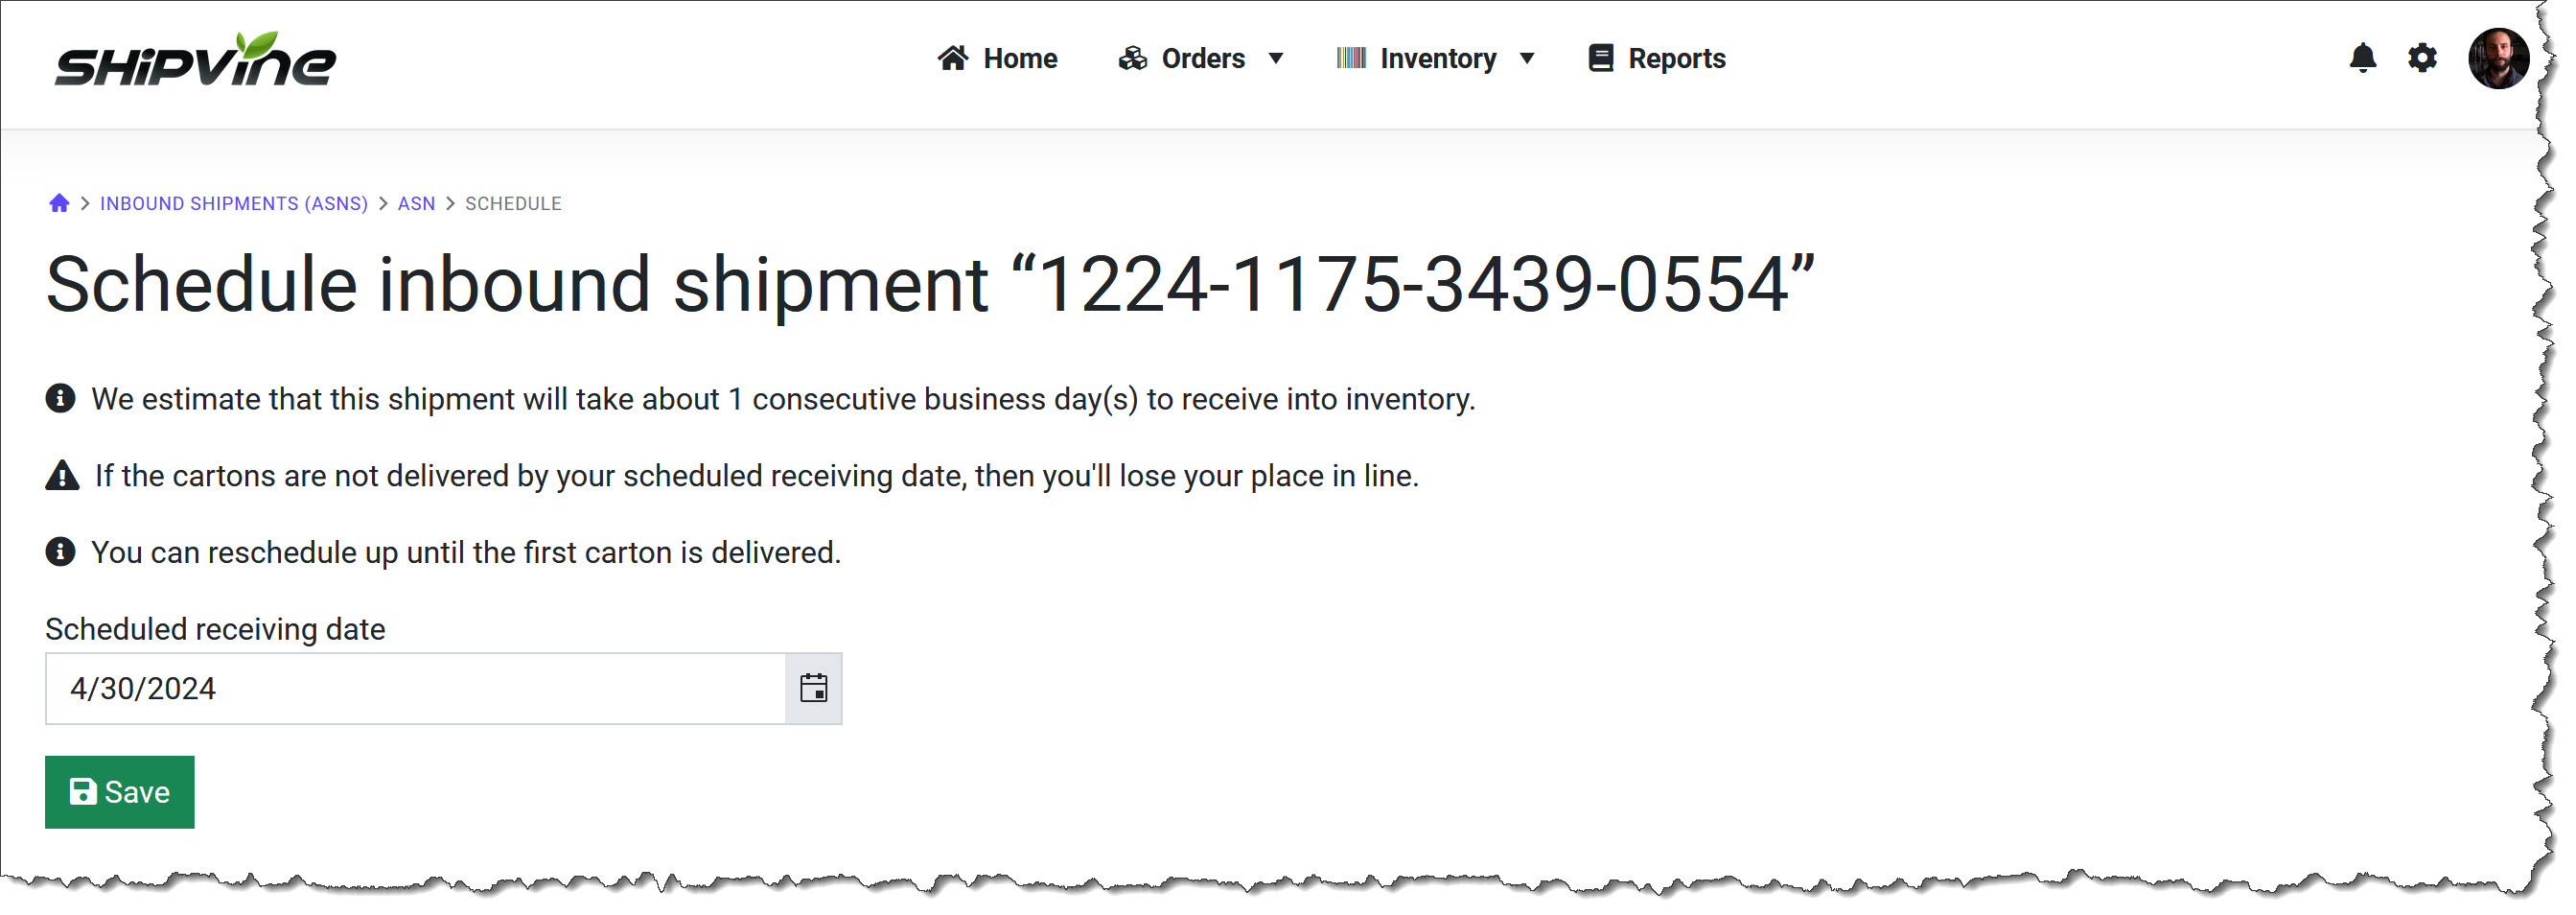
By scheduling an anticipated receiving date, your inbound will show up on a timeline that the receiving team in each location is using so that they can plan around it.
If you do not schedule your inbound, then upon arrival, Shipvine employees will schedule your inbound based on availability.
Similarly, if your inbound shipment arrives after your scheduled receiving date, Shipvine employees will reschedule your receiving based on availability.
The good news is that Shipvine employees must schedule your inbound shipment to begin the receiving process, ensuring that everyone has better visibility into the receiving timeline.
Step 6—When your shipment is delivered
Did you know that at each Shipvine location, every single package that arrives at our loading dock doors gets scanned? These scans get saved in a special part of our system that our employees see.
That's why it's so important to provide us with tracking numbers or Shipvine Carton Labels on your inbound shipments.
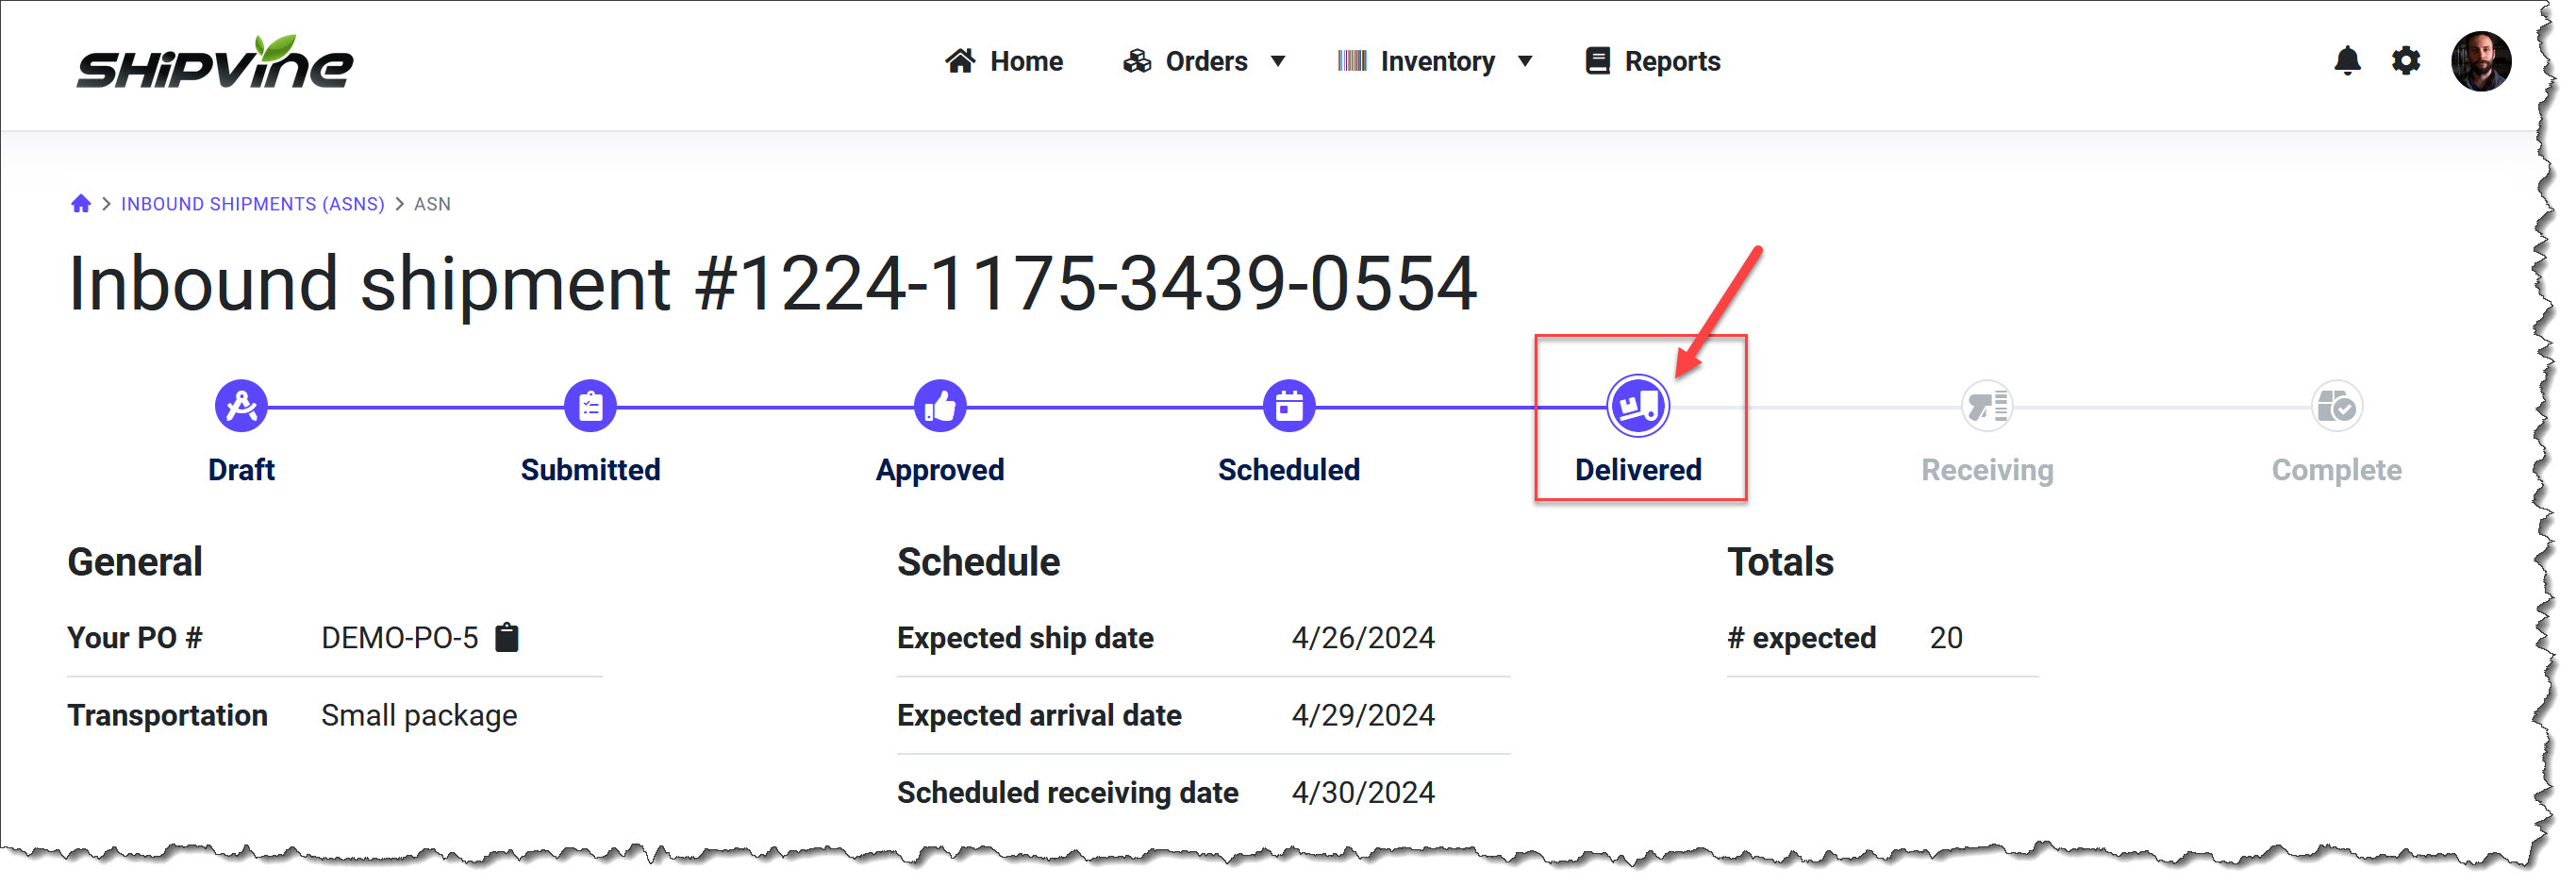
If you do so, then your inbound shipment will automatically get marked as delivered as soon as the first carton hits our loading dock, and it will immediately show up as due work on our employee's scheduling screens. No need to call or email Shipvine Support if the tracking data is provided ahead of time!
From here on out, you can sit back and relax as Shipvine receives your inbound shipment. Like the old way, you'll see the manifest numbers updating in real time as employees begin receiving your items.
If you used Shipvine Carton Labels and provided accurate carton-level detail, you will be stunned at how quickly Shipvine employees can now receive your goods into inventory.
Frequently asked questions
Do I have to schedule my inbound shipments?
No, you don't have to schedule your inbound shipments. Once your inbound shipment is in the "approved" state, you can ship your items to Shipvine.
Scheduling your inbound shipments allows you to reserve a place in the receiving line against other clients, so to speak. If your shipment arrives late and misses your scheduled date, there won't be a fee, but you'll lose your place in line.
Do I have to use the Shipvine Carton Labels? I don't see how this possibly would work with my factory's manufacturing process.
You don't have to use them, but we strongly encourage you to use the Shipvine Carton Labels on each carton in your inbound shipment. They dramatically speed up the receiving process for Shipvine.
Try to have a conversation with your factory or supplier about incorporating these labels into the manufacturing process. You'll be glad you did when your goods start getting received into inventory much faster than before.
In the meantime, have your factory clearly mark the cartons with a number like "carton 1 of 25" or "carton 2 of 25" and make sure that these numbers match up with what you've uploaded in your inbound shipment.
My vendors sometimes backorder items and don't tell me, or are incapable of providing carton-level detail. What is going to happen to me?
For clients in this situation, the "Create backorder" button is available in the new portal as it was before. The only extra step is they still have to go through the approval process.
It is to be expected that there will be situations where you are unable to provide carton-level detail. You can enter everything as carton #1, and Shipvine employees will revert to item-based scanning and receiving, but you will end up paying $2/physical carton and need to to expect a much longer receiving time frame.
What is the point of the approval process if you are just going to approve everything?
From time to time, Shipvine has had problems with clients sending prohibited items or unacceptably large quantities of items, particularly during peak season. The approval process enables us to review inbound shipments before these problems happen.
Additionally, the approval process ensures that a Shipvine employee saw your inbound shipment, whereas previously they could get lost in a sea of notifications and data.
I think I've encountered a bug or a problem. Who do I contact?
The new client portal and the new receiving process are the biggest changes we've made at Shipvine in 15 years. It's an exciting future, but there may have been a few things we missed. Please contact us at Shipvine Support with a detailed description of any issues that you're experiencing, and we'll work together to figure it out.
What happens if I send items to Shipvine without creating an inbound shipment first?
Like before, you'll receive a missing inbound shipment notice on your dashboard and be asked to create the inbound shipment, and you'll pay a $30 research fee. |